The Empty Nester Mastery Guide: Best Evolutions & Fusion Strategies for Ball x Pit (2025)
The Empty Nester represents one of Ball x Pit's most strategically complex characters, offering players a unique multi-shot playstyle that rewards careful positioning and tactical thinking. This comprehensive guide will help you master The Empty Nester's evolution paths, fusion strategies, and advanced gameplay techniques to dominate your matches.
Understanding The Empty Nester's Core Mechanics
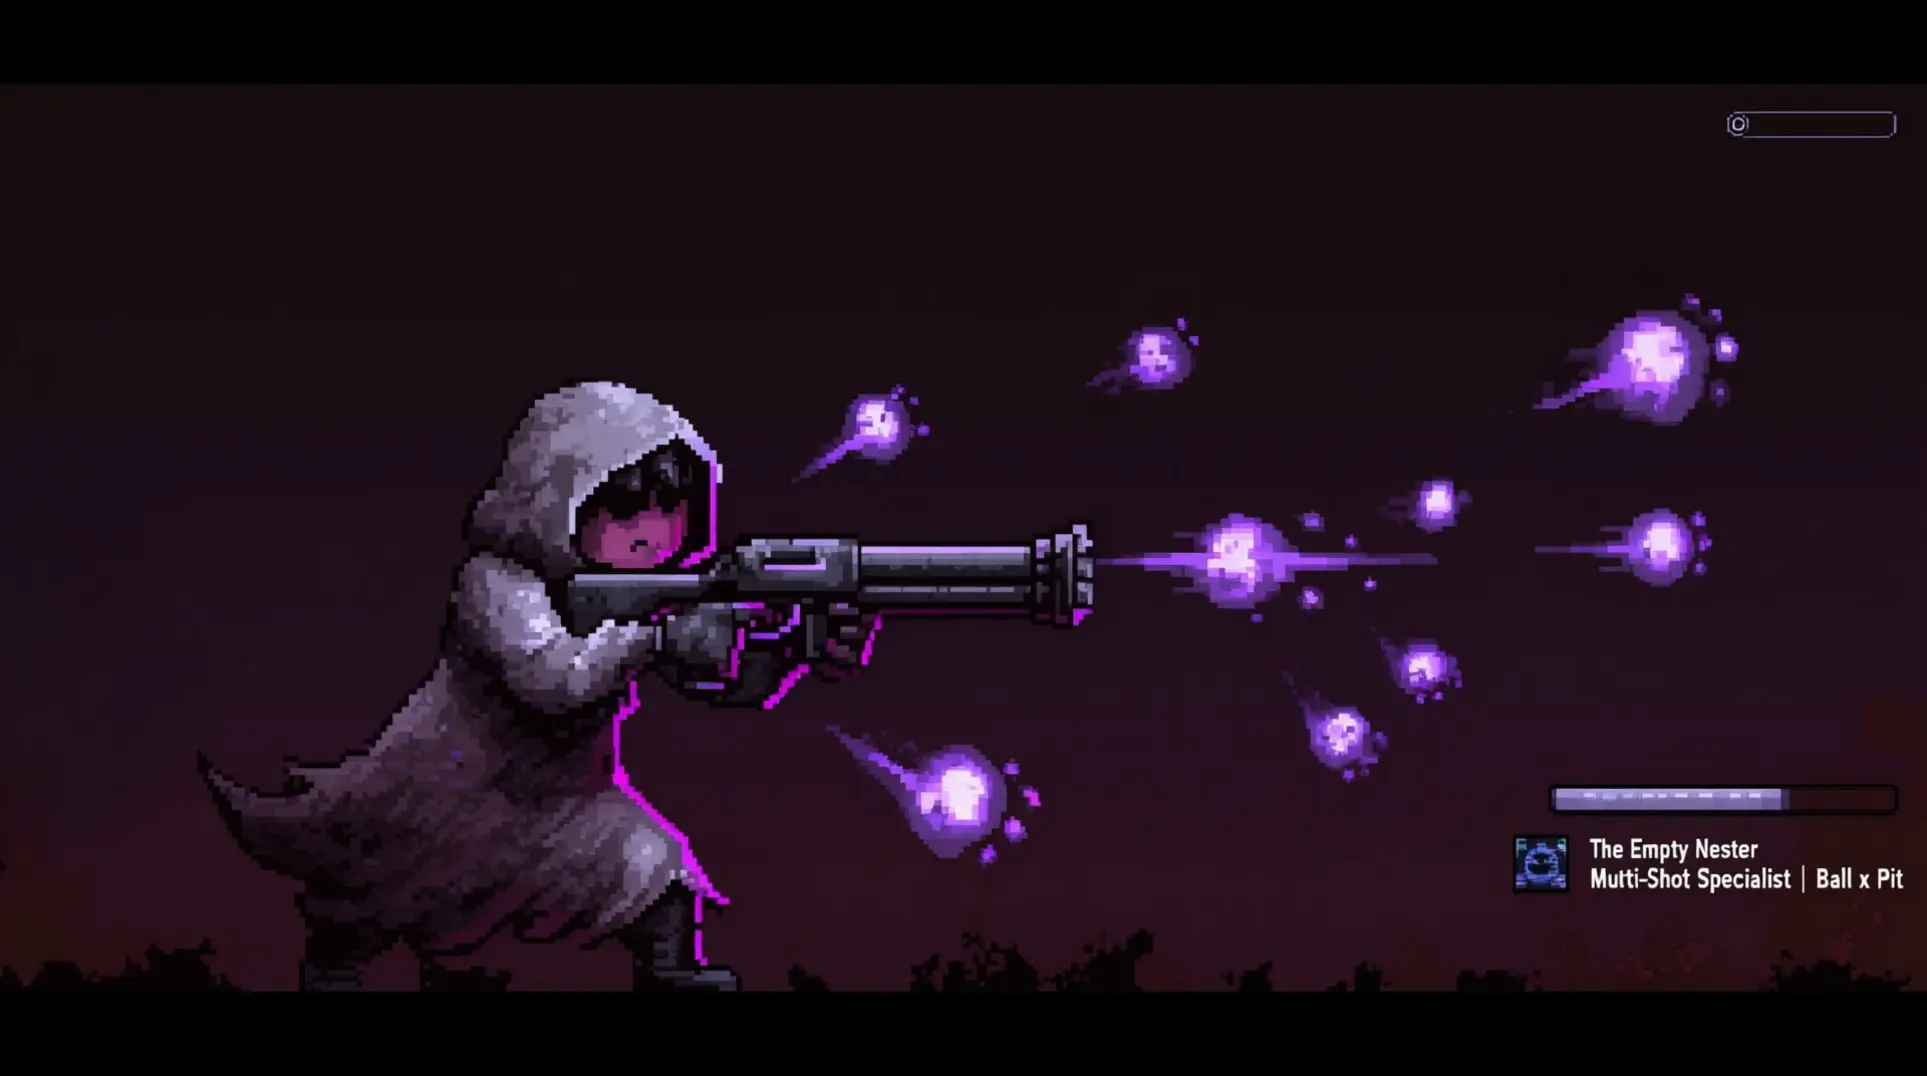
The Empty Nester's defining characteristic is its multi-shot capability, which sets it apart from other characters in Ball x Pit. This mechanic allows players to fire multiple projectiles simultaneously, creating opportunities for area denial and multi-target engagement.
Multi-Shot Fundamentals
The character's multi-shot system operates on an on-attack clone burst mechanism, where every Special Ball shot instantly spawns several extra copies of that same ball in a tight cluster. Each shot consumes energy that regenerates over time, making resource management crucial for sustained performance. The spread pattern can be adjusted based on character positioning and target density, offering tactical flexibility in various combat scenarios.
Positioning and Range Optimization
Success with The Empty Nester heavily depends on maintaining optimal distance from enemies. The character's effectiveness depends on the equipped ball type and evolutions, as the multi-shot mechanic fires multiple balls simultaneously without a fixed range peak. Players should prioritize positioning that allows for quick repositioning while keeping enemies within the effective range envelope.
Evolution Path Analysis: Virus vs Soul Sucker
The Empty Nester offers two primary evolution paths, each catering to different playstyles and tactical approaches. Understanding these paths is essential for maximizing the character's potential.
Virus Evolution Path
The Virus evolution focuses on damage-over-time effects and area control. This path excels at controlling space and wearing down multiple enemies simultaneously.
Virus Path Benefits
Virus-infected projectiles continue dealing damage for several seconds after impact, creating persistent threat zones. This evolution particularly shines in defensive scenarios where controlling space is more important than immediate elimination. The path's strength lies in its ability to pressure multiple enemies while requiring minimal direct engagement.
Optimal Virus Build Strategy
Players following the Virus path should prioritize upgrades that enhance the duration and spread of infection effects. Focus on abilities that increase projectile count and infection radius to maximize area denial potential. This build excels in team compositions that can capitalize on controlled spaces.
Soul Sucker Evolution Path
The Soul Sucker evolution emphasizes direct damage and resource harvesting, making it ideal for aggressive playstyles and sustained engagements.
Soul Sucker Path Benefits
This evolution converts damage dealt into temporary buffs and resources, allowing for increasingly powerful performances as engagements continue. The path rewards skilled players who can maintain consistent pressure while managing multiple threats simultaneously.
Optimal Soul Sucker Build Strategy
Soul Sucker builds should focus on damage amplification and resource conversion efficiency. Prioritize upgrades that increase damage per projectile and enhance the resource conversion rate. This path works best in aggressive compositions that can maintain constant pressure on enemy positions.
Fusion Strategies and Combinations
Effective fusion strategies can dramatically enhance The Empty Nester's performance, creating synergies that amplify the character's strengths while mitigating weaknesses.
High-Impact Fusion Combinations
The most effective fusions for The Empty Nester focus on enhancing either the multi-shot mechanics or the chosen evolution path. Players should consider fusions that complement their preferred playstyle rather than trying to balance all aspects equally.
Defensive Fusion Options
Defensive fusions enhance survivability and positioning flexibility, allowing for more aggressive positioning while maintaining safety. These combinations work particularly well with Virus evolution paths, where sustained positioning is crucial for maximizing area control effectiveness.
Offensive Fusion Strategies
Offensive fusions amplify damage output and resource generation, perfect for players who prefer aggressive, high-tempo gameplay. Soul Sucker evolution paths benefit significantly from offensive fusions, as they enhance the path's natural advantages in sustained engagements.
Advanced Gameplay Techniques
Mastering The Empty Nester requires understanding advanced techniques that go beyond basic mechanics and evolution choices.
Timing and Rhythm Management
Successful multi-shot usage requires developing a consistent firing rhythm that maximizes damage output while avoiding resource depletion. Players should practice timing their shots to coincide with enemy movement patterns and team coordination opportunities.
Map Control and Positioning
The Empty Nester excels at controlling key map areas through strategic positioning and multi-shot deployment. Understanding sight lines, chokepoints, and high-value positions is crucial for maximizing the character's impact on match outcomes.
Team Coordination Strategies
Effective team play with The Empty Nester requires clear communication about positioning, target priority, and resource management. The character's area control capabilities can create opportunities for team members to engage enemies with reduced risk.
Common Mistakes and How to Avoid Them
Many players struggle with The Empty Nester due to common tactical errors that can be easily corrected with proper understanding and practice.
Positioning Errors
One of the most frequent mistakes is poor positioning that either exposes the character to excessive risk or reduces multi-shot effectiveness. Players should always maintain awareness of escape routes and optimal firing positions.
Resource Management Issues
Wasting multi-shot opportunities or overextending during engagements can severely impact performance. Developing disciplined resource management habits is essential for consistent success with this character.
Evolution Path Confusion
Some players attempt to hybridize evolution paths, resulting in suboptimal performance in both directions. Committing fully to either Virus or Soul Sucker paths typically yields better results than attempting to balance both.
Conclusion
Mastering The Empty Nester in Ball x Pit requires dedication to understanding its unique multi-shot mechanics, committing to a specific evolution path, and developing advanced tactical awareness. Whether you choose the area control focus of Virus or the aggressive potential of Soul Sucker, success depends on consistent practice and strategic thinking. The character's complexity rewards skilled players who can leverage its strengths while managing its resource requirements effectively.
More Ball-x-Pit Guides

The Ultimate Physicist Guide for Ball X Pit (2025 Meta)
Master The Physicist's gravity control in Ball X Pit. Learn best evolutions, fusion combos, positioning strategies, and 2025 meta builds for competitive gameplay.
Ball X Pit: The Complete Tactician Guide - Evolutions, Strategies & Fusion Tactics
Master The Tactician character in Ball X Pit with our comprehensive guide covering turn-based strategies, optimal evolution combinations, fusion tactics, and base building for maximum efficiency.

The Repentant Build Guide: Mastering Bounce Mechanics & Top Evolution Combos
Master The Repentant character in Ball X Pit with our comprehensive guide covering optimal evolutions, fusion strategies, character builds, and advanced gameplay tactics.
AI Tactical Companion
Consult with our specialized tactical engine for Ball-x-Pit to master the meta instantly.