The Ultimate 100% Completion Guide for Ori and the Will of the Wisps

Introduction
Achieving 100% completion in Ori and the Will of the Wisps is a marathon, not a sprint, requiring meticulous planning and knowledge of the game's hidden systems. This guide provides the definitive, community-vetted route and strategies to fill every completion bucket, secure every achievement, and avoid the infamous 99% bug.
Understanding 100% Completion: What Actually Counts
The 10 Completion Buckets System
If you're aiming for that perfect save file in Ori and the Will of the Wisps, you need to understand how the game actually calculates completion. It isn't just one big number - it's split into 10 separate buckets that all fill up independently. Miss one item in any category, and you'll be stuck watching that 99% taunt you forever.
The first bucket is Collectibles, which is the biggest time sink. You're looking at 24 Life Cell fragments and 18 Energy Cell fragments to max out your health and energy, plus 40 Gorlek Ores for building up the Wellspring Glades. And don't forget every single Spirit Light container - there are 148 of them scattered around, so you'll be hunting for those glowing orbs for a while.
Next up are Spirit Shards. You must collect all 31 unique Spirit Shards and upgrade them to their maximum tier (Tier 3). Shards that cannot be upgraded already count as maxed when owned.
Then there's the Shard Slots bucket. You must purchase all five Shard Slot upgrades from the merchant Lupo to increase the number of slots you can equip.
Side Quests are another bucket. You must complete all 24 side quests, such as the 'Hand-to-Hand' trade sequence and 'Rebuilding the Hollow'.
Keystone pairs are required for door puzzles. You'll need to collect these to open Spirit Gates throughout the world.
There is a specific bucket for Kwolok's Burrows keystone, which requires finding 3 specific keys.
The Spirit Trials bucket requires you to beat the target time in all 8 regions. This isn't just for the Speed Demon achievement - it directly feeds into your completion percentage, so you'll need to master those races.
Combat Shrines are 5 arena challenges that each award a Spirit Shard, and each one counts toward your regional completion. They're tucked away in various corners of the map, and some are pretty brutal.
The Optional Boss: Shriek is a specific bucket; defeating her is required for 100%.
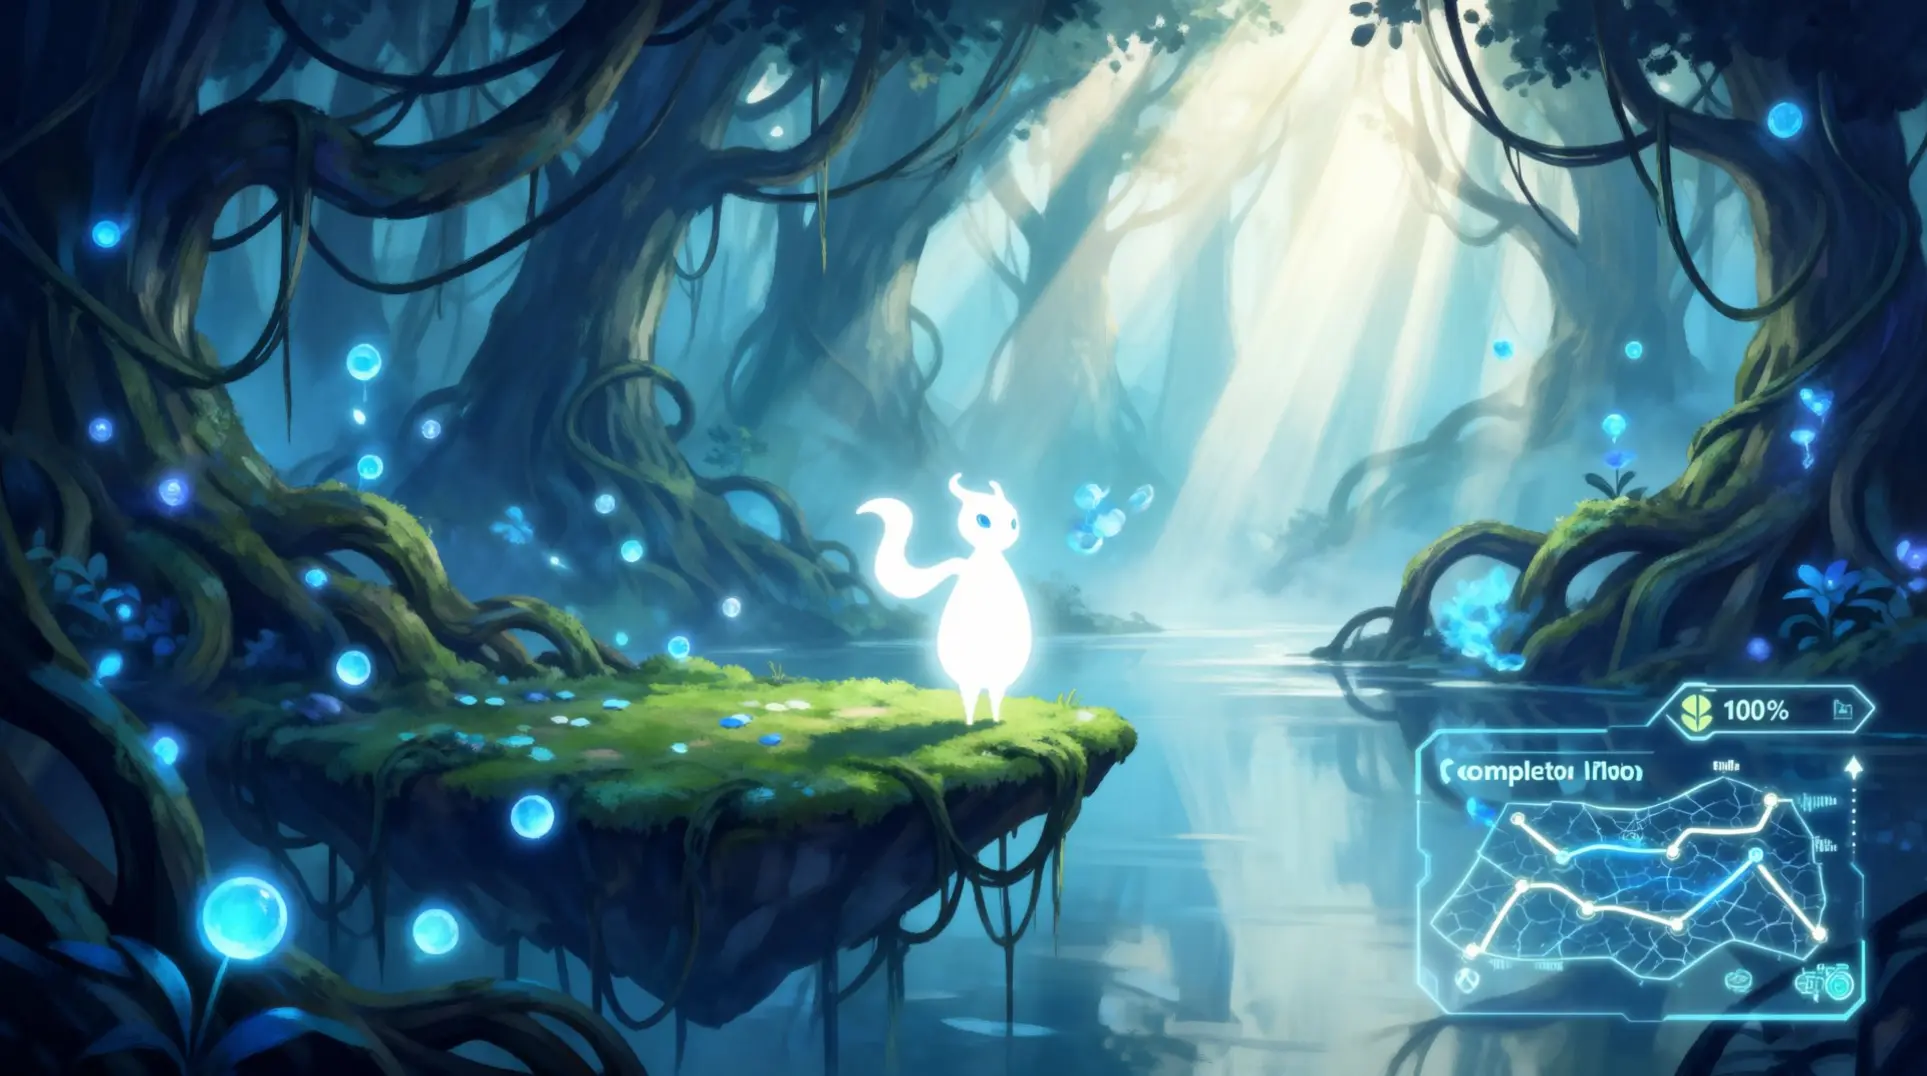
Finally, you must achieve In-game map 100% in every sub-area. Only tiles with actual content or collision matter now, which means you can't just run around unveiling the map anymore - you have to physically grab everything.
Oh, and here's the kicker: each of the 11 regions tracks its own 100% independently. The global counter just sums those regional totals, so if you're missing something in Wellspring but everything else is perfect, you'll still see 99% on your main save file.
Common 99% Traps and How to Avoid Them
Alright, so you've scoured every inch of Niwen but you're still stuck at 99%. Don't worry - this happens to almost everyone, and it's usually one of a handful of gotchas.
The biggest culprit is Twillen's Shards. Twillen sells nine shards: Bounty, Charge Efficiency, Collector, Last Stand, Light Harvest, Magnifier, Overflow, Splinter, and Ultraburst. Ensure you have purchased all of these.
Another silent killer is Inventory Desync. Sometimes Motay's notebook says you have 23/23 Energy Cells, but your actual inventory shows 19/20. If the numbers don't match, the game thinks you're missing something, and the fix is simple - save and quit to desktop (not just the menu, but completely close the game). This forces a local flag re-check and often flips that stubborn 99% to 100%.
Post-Patch Orbs trip up returning players hard. Two Spirit Light containers are often reported as moved, but this is inaccurate. In Kwolok's Hollow, the container under the stone slabs was not physically moved, but the timing to collect it was made tighter due to faster platform reset speed. In Silent Woods, no Spirit Light containers were moved; the 'missing' containers are either quest-locked (like the Owl hut rooftop container, which only appears after completing the 'Hand to Hand' quest) or obscured by visual updates (thicker vines and darker shadows).
If you're stuck in the Wellspring 97-99% range, it's probably the race tunnel bug. There's a Spirit Trial and a Combat Shrine inside that tunnel, and sometimes they don't flag correctly, so after finishing the race, re-enter the tunnel and physically touch the shrine again to make sure it registers.
And those leaf piles and hidden alcoves? Classic culprits. Use your bash ability on suspicious leaf piles and check every water wheel and vertical shaft - there's probably a Spirit Light container hiding right under your nose.
If all else fails and every zone reads 100% but your global save doesn't, it's time for the nuclear option: upload your save to the cloud, delete your local save file, launch the game offline, start a new save slot, quit, then restore your original save. This forces a complete re-scan of your completion flags and usually fixes the issue.
Essential Collectibles: Complete Count and Locations
Spirit Shards (31 Total) - The Shard Hunter Achievement
If you're hunting that Shard Hunter achievement, you'll need every single one of these 31 passives. Luckily, they're split into three easy categories, and nine of them are just a shopping trip away.
Combat Shards are your damage dealers - like Reckless, which is frozen inside the first icefall in Baur's Reach. You can't miss it, but you'll need Burrow to crack that ice and grab it.
Survival Shards keep you alive. Resilience is a perfect example, and it's a side-quest reward from Tokk in Baur's Reach, so you'll get it naturally if you're talking to NPCs.
Exploration Shards are the real secret sauce. Treasure Hunter and Spirit Magnet make the grind way less painful, and then there's Secret - the one that gives you a fat 70% damage bonus if you can avoid damage for eight seconds. You'll find it above the second spider rope gauntlet in Mouldwood Depths, but the real MVP here is Secrets Revealed, which you can buy from Twillen in Wellspring Glades.
Speaking of Twillen, he'll sell you nine shards outright: Bounty, Charge Efficiency, Collector, Last Stand, Light Harvest, Magnifier, Overflow, Splinter, and Ultraburst. Grab these early since they're not hidden behind platforming challenges.
Life Cells & Energy Cells (12 Each)
Your health and energy bars max out at 12 cells each, but you won't find whole cells sitting around. Instead, you're collecting fragments - two fragments make one full cell, which means you're really hunting for 24 fragments of Life Cells and 18 fragments of Energy Cells.
Another fragment is hiding under the lava wheel in Baur's Reach, but you'll need Burrow to reach it safely.
Energy Cell fragments love to tuck themselves away in Luma Pools. Check the trial rooms and look for breakable walls in underwater air pockets - they're almost always hiding there. These pools are also where you'll test your Swim Dash, so make sure you've got that ability ready.
Gorlek Ores (40 Total) - Rebuilding Wellspring Glades
Here's where things get confusing: the game scatters 40 Gorlek Ore pieces across the map, not 28. You'll need every single one if you want to rebuild all the fast-travel wells and shops in Wellspring Glade, so keep your eyes peeled.
In Wellspring Glade itself, you can grab three pieces pretty early - one's on top of the giant mushroom landmark, and another comes from a local quest giver.
Luma Pools holds two pieces: one sits behind a laser-drill on the upper route, while the other hides under an east waterfall and requires Swim Dash to reach.
Windswept Wastes is where you'll find four pieces, mostly along sand-slide paths and inside that brutal rotating-spike gauntlet trial.
Windtorn Ruins has three pieces that demand the Launch & Burrow combo - check the main elevator shaft and dig under sand piles.
The real kicker? That last elusive piece is locked behind the 'Hand to Hand' side-quest chain. If you're stuck at 39/40 and can't find the final ore, that's your culprit.
Keystones, Spirit Light, and Hidden Containers
Keystones aren't a fixed collectible like the others - they're area currency. You'll need 14 total to open every Spirit Gate in the game, but they respawn, so don't stress about missing one.
Spirit Light containers are where your real XP comes from, and they break down into three sizes: mini, large, and giant (which dumps 1000-1500 XP in your lap). Giant containers almost always hide behind breakable walls or in underwater air pockets, and they won't even show up on your map until you're standing a few meters away.
That's why Secrets Revealed is non-negotiable for 100% completion. This shard makes hidden walls and containers glow bright blue, so you're not bash-attacking every random wall like a maniac. Once you have it, you can farm Spirit Light efficiently in Windswept Wastes by combining Turmoil (which respawns enemies) with Light Harvest and Bounty shards. The enemies come back, you kill them again, and the Spirit Light keeps rolling in.
Region-by-Region 100% Completion Guide
Early Game Regions (Inkwater Marsh, Kwolok's Hollow, Wellspring Glades)
Starting your 100% run means hitting the ground running in Inkwater Marsh, and the very first thing you'll want to do is grab that Map Stone and haul it back to Lupo. He'll sell you the parchment map for just 50 Spirit Light, which is an absolute steal since it reveals every collectible spot on your screen. While you're down there, don't miss the Spirit Magnet shard hiding in the bottom-left flooded cavern - you'll need Bash to bust through that sturdy wooden gate, but trust me, it's worth the detour.
The full Marsh checklist is pretty packed: you're hunting down 6 Life Cell Fragments, 3 Energy Cell Fragments, 4 Spirit Wells, 3 Gorlek Ores (one comes from the 'A Little Braver' quest), 5 Spirit Shards (including that Spirit Magnet), 8 Large and 50 Small Spirit Light containers.
Once you reach Kwolok's Hollow, you'll need to backtrack after getting Light Burst from Baur's Reach since those purple barriers block access to the Vitality and Energy Harvest shards plus some Life/Energy fragments you can't reach on your first pass. The Hollow's got 5 Spirit Shards total (you can grab Secret from Twillen, plus Finesse, Vitality, Life Harvest, and Energy Harvest), a ton of Spirit Light containers scattered everywhere, and you'll need to finish the 'Hand-to-Hand' side-quest that terminates here.
Wellspring Glades acts as your hub, and luckily Lupo gives you the first map for free near the entrance. The upgraded detailed map costs 150 Spirit Light and hides behind a Burrow-sand wall, so you'll need that ability first. 100% completion here hinges on several questlines: 'Rebuilding the Hollow' (feed Grom 9 total Gorlek Ores), Tuley's gardening (find all 4 seeds), turn in the final 'Hand-to-Hand' parcel, and escort the Moki family back from Silent Woods. It's a lot of running around, but hey, that's early game for you.
Mid-Game Challenges (The Wellspring, Silent Woods, Mouldwood Depths)
The Wellspring is where things get wet and wild. You'll need Grapple (found in the first dry chamber) to navigate this water-based zone, and Lupo's map costs 150 Spirit Light from his spot just right of the entrance door. For 100%, you're hunting Life Harvest & Thorn shards, the Ultra Grapple shard, Energy & Life Cell Fragments, and 4 Keystones for the final door. Those bubble-grapple chains are essential for underwater sections, but once you get the rhythm down, it's smooth sailing.
Now, Silent Woods is where the game starts getting mean - there's no Lupo map here, which means you'll want a video guide open on your second monitor. You'll need Launch from Baur's Reach and Feather from Kwolok's quest to reach everything: all 8 Spirit Light Containers, 4 Life and 2 Energy fragments, 1 Gorlek Ore, and the Ultra Bash shard. It's depressingly easy to miss stuff here, so check every corner twice before you leave.
Mouldwood Depths introduces the darkness mechanic that builds a 'Dread' meter, and surviving means lighting braziers, equipping the Torch shard, or using Lantern enemies for mobile light sources. The 100% checklist is leaner but trickier: 2 Spirit Light Containers, 2 Life and 1 Energy fragments, 1 Gorlek Ore, and 3 Keystones for the boss gate. After beating Mora, the central elevator unlocks, letting you backtrack for the final Spirit Light Container and Life Cell Fragment hidden above the left geyser. Don't leave without those.
Late Game & Optional Areas (Luma Pools, Baur's Reach, Windswept Wastes, Windtorn Ruins)
Baur's Reach brings ice mechanics into play, and you'll need Light Burst to melt red ice while using Bash to redirect fire and ice seeds through puzzles. The 100% collectibles here include 7 Spirit Light Containers, 2 Life and 2 Energy fragments, 1 Gorlek Ore, 4 Keystones for the wisp chamber, and a Spirit Trial that'll test your movement. It's a lot, but the verticality makes for some genuinely fun platforming challenges.
Windswept Wastes requires serious cash - Lupo's map costs 300 Spirit Light from his spot atop the first sand-ball launcher near the Spirit Well. 100% hinges entirely on the Burrow ability to clear 3 Spirit Light Containers, 1 Life and 1 Energy fragment, 4 Keystones, and the final wisp seed. Without Burrow, you're basically locked out of completion here, so come prepared.
Luma Pools demands both Water Breath and Swim Dash just to function, and Lupo's map will set you back 150 Spirit Light from a purple-barrier surface room right of the eastern Spirit Well. The 100% checklist includes 2 hidden Spirit Light containers behind breakable walls, multiple Keystone doors, bubble-bash puzzles, and a Gorlek Ore above the western turbine that's only reachable with Swim Dash loops. It's a pricey but gorgeous area.
Windtorn Ruins is pure post-game content - you'll need all 4 Wisps and the Map Stone Fragment to even access it. 100% is mercifully short: just one Energy Cell Fragment and the Map Stone interaction itself, reached via a Light Burst → Bash → Burrow route. The Energy Cell hides behind a short sand tunnel, while the Map Stone Fragment comes from the Gorlek in Windswept Wastes after you finish 'Hand-to-Hand' and hand in the Canteen.
End Game & Secret Zones (Willow's End, Midnight Burrows, Weeping Ridge)
Midnight Burrows is a hidden gem with a sneaky entrance south of Wellspring. You'll need to ring three flowers in Low-High-Mid order based on stone stele heights to open the gate, which is way more confusing than it sounds. Lupo's map costs 250 Spirit Light from the first left ledge, and 100% requires 4 Keystones, the Deflector shard behind the Keystone Gate, 2 Life/Energy fragments, all Spirit Light containers, and finishing Tokk's 'Into the Burrows' side-quest.
Willow's End is the final story area, and the 100% checklist includes 1 Life and 1 Energy fragment, 1 Gorlek Ore, 3 Spirit Shards (Splinter, Last Stand, Reckless), and 8 Corrupted Hearts you must shatter to open the Spirit Willow for the final boss. It's the home stretch, so don't miss these before crossing the point of no return.
Finally, Weeping Ridge is a one-way portal exit after Willow's End - only 7% completion but the items are mandatory. You need 4 Spirit Light Containers, 3 Keystones, and 1 Gorlek Ore before the exit lever drops you into the next screen. Here's the kicker: missing anything forces a New Game+ or save reload because the sand portal seals after drop-in. Pull the lever to open the background door and trigger the Shriek boss fight, but make absolutely sure you've grabbed everything first or you'll be kicking yourself later.
Pro Completionist Strategies and Route Optimization
So you want to 100% Ori and the Will of the Wisps without wasting hours backtracking? The community has cracked the optimal route, and it hinges on one simple rule: grab Triple Jump early, then Grapple, then clean house.
Optimal Progression Route for 100%
Your first playthrough should follow this exact sequence: Inkwater Marsh, Kwolok's Hollow, Silent Woods (for Triple Jump), Bauer's Reach (for Grapple), Mouldwood Depths, Luma Pools, Windswept Wastes, then finally Willow's End. This order minimizes revisiting areas and lets you grab key abilities when you actually need them.
The moment you hit a new zone, your first stop is Lupo. Buy his map immediately, which reveals every collectible on your map and saves you from aimless wandering - there's nothing worse than missing a Life Cell fragment because you were too cheap to spend the Spirit Light.
After the credits roll, you have three cleanup tasks, and order matters here too. Hit Inkwater Marsh first to nail the race timer, then Silent Woods for any Spirit Trials you skipped, and finish in Wellspring Glades to buy those last two shard slots. This mop-up should take you maybe two hours if you were thorough the first time.
Essential Shards for Completionists
Let's talk shards, because your loadout makes or breaks a collection run. The single most important shard is Ultra - it doubles your magnet radius and lets you vacuum collectibles through walls and floors. You’ll be grabbing stuff you didn't even know was there.
Your second priority should be Catalyst, which refunds 50% of your energy and lets you spam abilities without constantly hunting for Wisps.
For the tougher areas, you'll want Overflow (regens life and energy in water), Lifeforce (25% more melee damage), and Quickshot (25% faster ability recharge). These three make shrine bosses and tricky platforming sections much less painful.
You start with three shard slots, but you need way more for a proper build. The only way to get them is through Lupo - five total upgrades available for purchase. Clear all Combat Shrines to get the Spirit Shards they grant, and purchase all slots from Lupo to end up with max capacity.
Spirit Trials and Combat Shrines Mastery
Here is where most completionists get tripped up: Spirit Trials require beating target times, not just finishing. You need to hit these numbers for 100% area completion:
- Marsh Dash: 0:55
- Burrows Bash: 0:45
- End Run: 1:05
- Pools Hop: 0:55
- Reach Slide: 1:15
- Mouldwood Sprint: 0:50
- Wastes Weave: 0:55
- Woods Skip: 0:40
If you are struggling, equip Triple Jump, Ultra Magnet, and Spirit Surge. The real tech is holding dash when you touch the ground - it resets your dash instantly. Combine that with air-dashing and you’ll shave seconds off your time without needing pixel-perfect inputs.
Combat Shrines are technically optional for story completion but they absolutely count toward 100%, plus they give you Spirit Shards. You'll need to clear all five: Marsh, Depths, Reach, Wastes, and Burrows. Each one is a wave-based fight that tests your build - if you are getting stomped, swap in Lifeforce and Quickshot to burst them down faster.
Achievement Checklist and Final Verification
Alright, let's break down the achievements that actually matter for 100% completion. Shard Hunter is your first target - it's worth 30 Gamerscore and unlocks when you have all 31 Spirit Shards in your inventory. You'll grab nine of these by buying them from Twillen, snag another from finishing the Hand-to-Hand quest, and get one more from Tokk's side-quest that gives you the 'Shard Secret'. The rest are sitting in the world waiting for you to find them.
Now, there's some confusion about upgrading shards. There is no achievement for maxing out every shard upgrade - so don't waste Spirit Light on ones you never use. The achievement people mix this up with is Fully Slotted, which requires purchasing all five Shard Slot upgrades from Lupo and gives you 15 Gamerscore.
The big one is the Completionist achievement, worth 100 Gamerscore, which pops upon completing every Side Quest (indicated by an empty Side Quest tab in the Quest Log). Ori and the Will of the Wisps has 37 achievements total that add up to 1,000 Gamerscore, so these three are your main targets.
Final Verification Checklist
Before you call it done, you need to verify everything actually registered. The game is picky, and that 99% bug will haunt you if you skip this.
First, open your world map and check that all 11 regions show a gold '100%' badge: Inkwater Marsh, Kwolok's Hollow, Wellspring Glades, The Wellspring, Midnight Burrows, Baur's Reach, Mouldwood Depths, Luma Pools, Silent Woods, Windtorn Ruins, and Willow's End. If even one is at 99%, you're not done yet.
Next, look at your load screen - it should display: Maps 100%, Spirit Shards 31/31, Life Cells 24/24, Energy Cells 18/18, Gorlek Ore 40/40, and Spirit Trials 8/8. This is the real source of truth, so if any number is off, that's where you need to focus.
Speaking of Spirit Trials, all eight of them need to show a Gold medal icon and a green check-mark. The locations are Inkwater, Wellspring, Baur's Reach, Mouldwood, Luma Pools, Silent Woods, Windtorn Ruins, and Willow's End. Just beating them isn't enough - you need the gold.
Finally, clean out your inventory completely. You should have zero leftover Gorlek Ore, Map Stones, Quest Seeds, or Keystones - everything must be spent or turned in to NPCs. And don't forget those five Combat Shrines, since each one awards a Spirit Shard you'll need.
Troubleshooting: Still Stuck at 99%?
If you've done all that and you're still staring at 99%, don't panic - this is super common. Here's what usually fixes it.
Problem: Missing a random Spirit Light container you can't see. Solution: Buy Twillen's final Map Stone that reveals Spirit Light container icons for every area. This often uncovers a hidden orb you walked past a dozen times.
Problem: Stuck at 99% in Silent Woods specifically. Solution: There are leaf piles you need to scatter using the Flap ability (burrow) to uncover two Spirit Light containers that never show up on your map. Yes, it's as annoying as it sounds.
Problem: Kwolok's Hollow feels incomplete. Solution: Swim down and left from the spot where Kwolok sat to find an underwater cache that's completely off-map.
Problem: Baur's Reach is at 99%. Solution: Check the upper rafters for a Spirit Light container that doesn't render until you're physically standing on the ledge.
Problem: Inkwater Marsh refuses to hit 100%. Solution: There's a single Energy cell fragment near the first Spirit Well that doesn't display even after buying all map upgrades. You literally have to walk every platform in the upper-left quadrant to find it.
PC-specific bug: Sometimes the game just miscounts. Close it completely, restart, and open your map immediately - this forces a re-count and can bump you to 100%.
Conclusion
With the optimal route, essential shards, and a thorough verification checklist, you have the blueprint to conquer Niwen completely. Follow these steps, double-check your progress against the final map and inventory screens, and claim that perfect save file and the Completionist achievement.
More ori-and-the-will-of-the-wisps Guides
Ori and the Will of the Wisps: Ultimate 100% Completion Guide
A comprehensive guide to achieving 100% completion in Ori and the Will of the Wisps, covering all collectibles, upgrades, challenges, and efficient routes.
Ori and the Will of the Wisps: Ultimate Resource Farming Guide
Learn how to farm Spirit Light efficiently and find all Gorlek Ore locations in Ori and the Will of the Wisps. Master progression strategies for 100% completion.
Ori and the Will of the Wisps: The Ultimate Guide to Hidden Secrets
Uncover every secret in Ori and the Will of the Wisps, from hidden shards and developer rooms to speedrun tech and nostalgic callbacks. A complete guide for completionists.
AI Tactical Companion
Consult with our specialized tactical engine for ori-and-the-will-of-the-wisps to master the meta instantly.