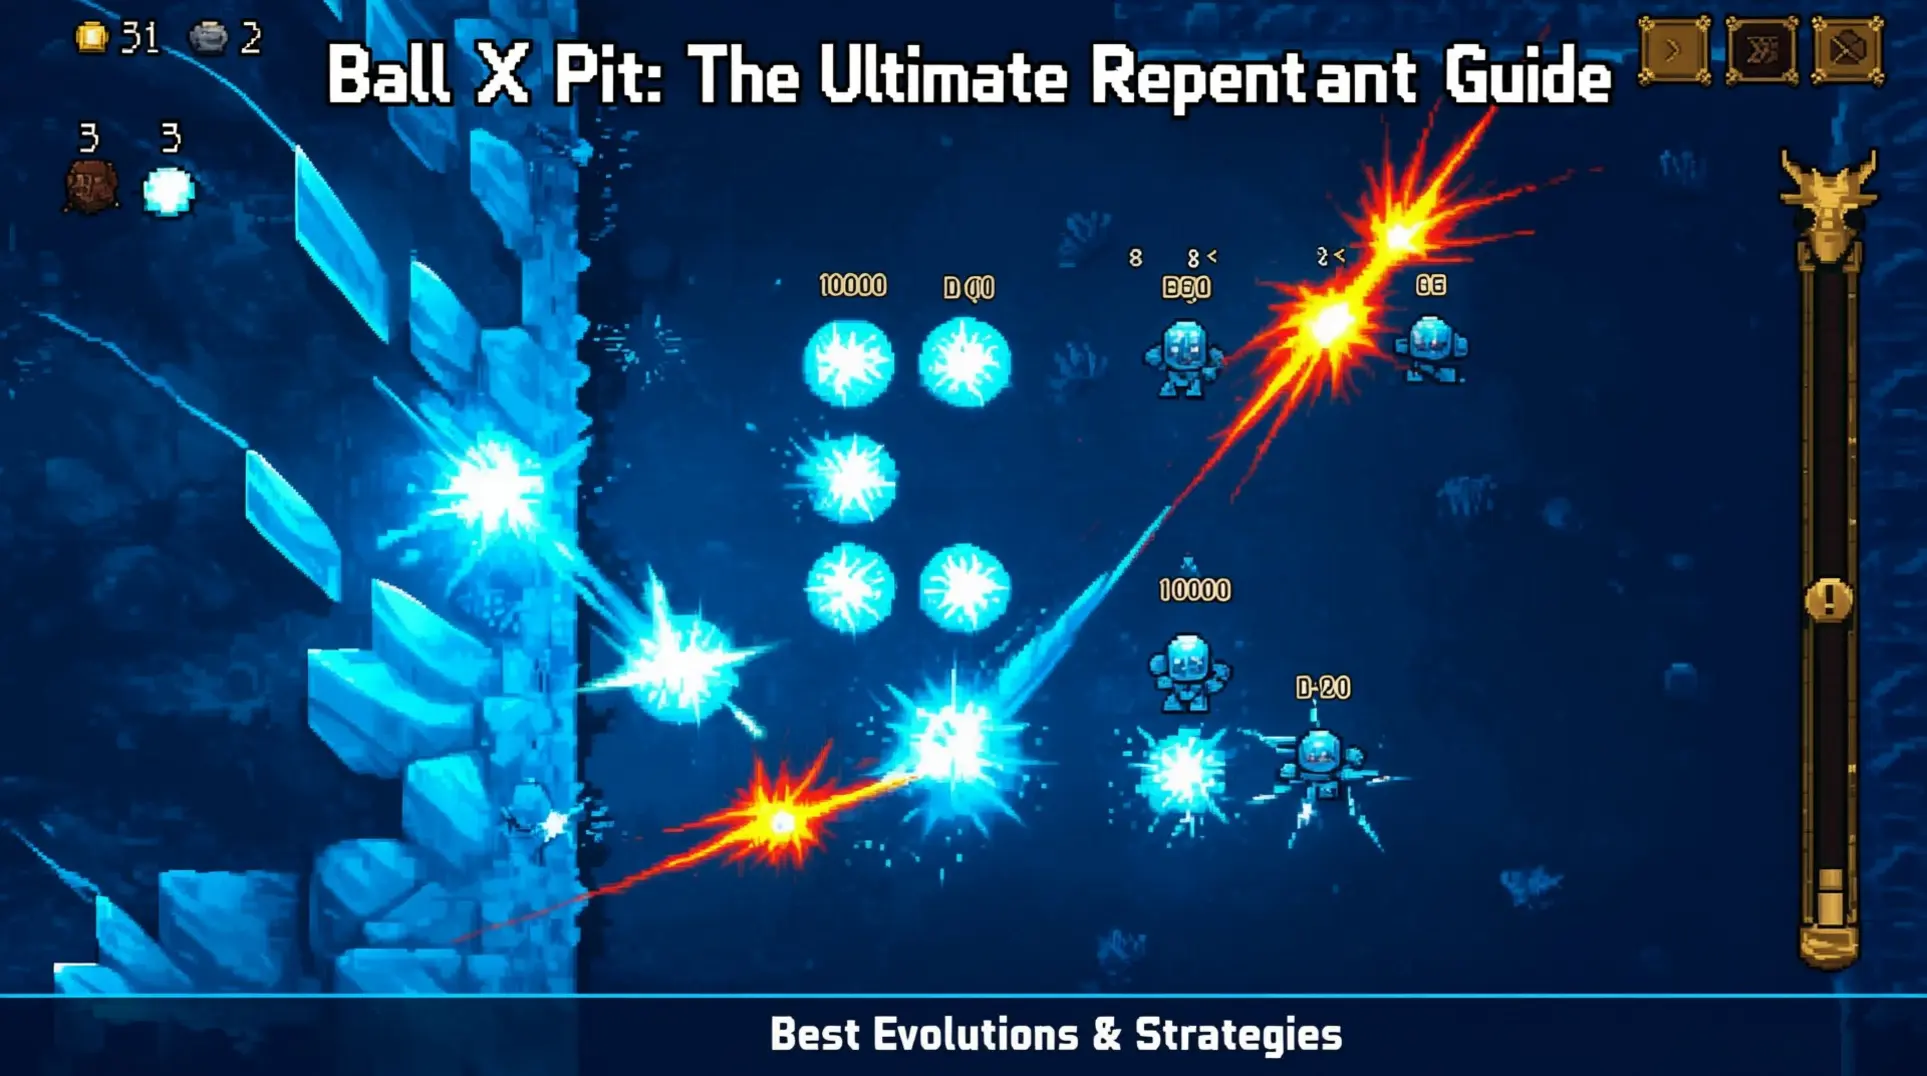
The Spendthrift Strategy Guide: Master Wide-Arc Firing Mechanics

The Spendthrift Strategy Guide: Master Wide-Arc Firing Mechanics
The Spendthrift fires all equipped balls simultaneously in a wide arc pattern, creating a cone-shaped area of effect that transforms your entire arsenal into devastating simultaneous destruction. This high-risk, high-reward character requires understanding his unique firing mechanics and early investment to build the ball count necessary for devastating late-game performance. His effectiveness scales exponentially with ball count, creating distinct phases from underperforming in early game to becoming one of the most powerful characters for area clearing in late game.
This comprehensive guide will teach you to master these unique firing mechanics completely. You'll learn precisely how the best evolutions—Soul Sucker, Vampire Lord, and Succubus—each enhance different aspects of your wide-arc arsenal. We'll cover the critical strategies needed to transform from underwhelming to unstoppable, maximizing your destructive potential.
Understanding The Spendthrift's Core Mechanics
Wide Arc Firing Pattern
The Spendthrift fires all equipped balls simultaneously in a wide arc pattern, creating a cone-shaped area of effect for crowd control scenarios. This creates a wall of projectiles covering a broad area in front of you.
Simultaneous Firing: All balls launch at once rather than sequentially, creating explosive impact across the entire arc. However, this comes with reduced individual ball control compared to characters who fire balls one at a time. You can't fine-tune individual shots as easily.
Predictive Positioning: Since all balls fire in a predetermined wide arc, pre-positioning becomes crucial for maximizing damage output. You must anticipate enemy movements to land effective volleys.
Ball Count Scaling
The Spendthrift's effectiveness scales exponentially with ball count, creating distinct phases where the character underperforms in early game with few balls but becomes devastating for area clearing in late game. Understanding these thresholds is crucial for optimal gameplay:
- Early Game (1-7 balls): Underwhelming performance, focus on survival
- Transition Phase (8-14 balls): Noticeable improvement, starts becoming viable
- Optimal Performance (15+ balls): Character becomes highly effective
- Late Game Dominance (25+ balls): Overwhelming screen coverage
- End-Gaze Power (40+ balls): "Way too many balls" - maximum devastation
The character truly shines when you have way too many balls. This creates overwhelming screen coverage as dozens of balls fire simultaneously, blanketing the entire area.
Engagement Range and Positioning
Maintain medium-range positioning to ensure the wide arc can encompass the largest possible enemy group. You want to be not too close, but not too far from your targets for optimal coverage. Position yourself in open spaces rather than corners or narrow corridors. Walls can block significant portions of The Spendthrift's firing range, severely limiting your effectiveness.
Multi-Angle Approach: Position where enemies approach from multiple angles to take advantage of the 180-degree firing arc. This reaches the maximum number of approaching enemies with each volley. Coordinate positioning with firing cooldown timing. Move to optimal positions while balls are recharging, then hold position long enough to execute the next wide arc volley.
Strengths and Weaknesses
The Spendthrift's design creates a powerful but specialized toolkit. Your success depends on playing to these specific strengths while mitigating the inherent weaknesses.
Key Strengths
- Explosive crowd control via cone-shaped area of effect
- Devastating area clearing in late game with 15+ balls
- Overwhelming screen coverage when you have way too many balls (25+)
Key Weaknesses
- Vulnerable when surrounded due to reduced ball control
- Reduced individual ball control compared to sequential characters
- Underperforms early game until ball count reaches critical mass (15+ balls)
Best Evolutions for The Spendthrift
The Spendthrift's three best evolutions are Soul Sucker, Vampire Lord, and Succubus. Each enhances different aspects of the character's wide arc firing mechanics. As discussed in our positioning strategies, your evolution choice should align with your current game phase and ball count.
Evolution Benefits by Game Phase
| Evolution | Early Game (1-7 balls) | Mid Game (8-14 balls) | Late Game (15+ balls) | End Game (25+ balls) |
|---|---|---|---|---|
| Soul Sucker | Excellent survival | Good sustain | Moderate effectiveness | Situational use |
| Vampire Lord | Risky but viable | Strong scaling | Excellent for aggressive play | Peak performance |
| Succubus | Balanced approach | Good all-around | Excellent late-game scaling | Optimal for perfection |
Soul Sucker Evolution
The Soul Sucker evolution provides crucial sustain capabilities for early game survival. It allows The Spendthrift to maintain his ball-heavy playstyle while offering life steal to offset the risks of getting close to enemies.
Soul Sucker triggers healing after just 1 hit, though its debuff must wear off before it can proc again. Combining it with ghost/wind or aoe balls maximizes your healing instances throughout combat.
Best For: Early game survival and players using ghost/wind or aoe ball combinations.
Vampire Lord Evolution
The Vampire Lord evolution works exceptionally well with The Spendthrift's need to stay in combat range. It provides healing benefits that complement his all-at-once firing pattern perfectly.
Vampire Lord is created by combining Vampire and Dark balls, inflicting 3 bleed stacks per hit. It heals 1 HP when hitting enemies with 10+ bleed stacks, consuming all stacks in the process.
Best For: Mid to late game when you can maintain close combat positioning and stack bleed effects efficiently.
Succubus Evolution
The Succubus evolution provides both offensive scaling and sustain, making it ideal for late game dominance. This makes it ideal for The Spendthrift, who needs to balance damage output with survivability during extended engagements.
Succubus enhances different aspects of wide arc firing mechanics. The evolution's sustain capabilities support extended engagements while maintaining damage output.
Best For: Late game optimization when ball count reaches 15+ for maximum effectiveness.
Evolution Selection Strategy
The Spendthrift scales exponentially with ball count, creating different evolution priorities depending on your current phase. The most effective Spendthrift builds focus on ball multiplication and sustain scaling. This requires evolutions that provide healing to complement your growing ball count.
All three evolutions provide sustain, but their mechanics suit different approaches. Soul Sucker works well for players using ghost/wind or aoe balls, Vampire Lord rewards staying in combat range, and Succubus balances damage with survivability for longer fights.
Mastering Positioning Strategies
Mastering positioning is crucial for maximizing The Spendthrift's wide-arc firing mechanics. Your evolution choice should complement your positioning strategy, while ball count thresholds determine how aggressive you can be.
Optimal Engagement Positioning
Maintain medium-range positioning to ensure the wide arc can encompass the largest possible enemy group. This sweet spot allows you to maximize damage without getting overwhelmed.
Take advantage of the 180-degree firing arc by positioning where enemies approach from multiple angles. This positioning reaches the maximum number of approaching enemies in a single volley.
Coordinate positioning with firing cooldown by moving to optimal positions while balls are recharging. Then hold position long enough to execute the next wide arc volley when ready.
Environmental Awareness
Position yourself in open spaces rather than corners or narrow corridors. Walls can block significant portions of The Spendthrift's firing range, severely limiting effectiveness.
Chokepoints: Narrow areas where enemies are forced to cluster together, making them ideal targets.
The Spendthrift excels when enemies are clustered within the firing arc. Positioning near chokepoints or corners where enemies naturally bunch up is highly effective for maximizing damage.
The Spendthrift's reduced ball control makes the character vulnerable when surrounded. Always ensure you have clear escape routes planned before engaging large groups.
Predictive Positioning
Predictive Positioning: The practice of anticipating enemy movement and pre-positioning your character before firing. The Spendthrift requires predictive positioning since all balls fire simultaneously in a predetermined wide arc. This makes pre-positioning crucial for maximizing damage output.
Take advantage of the 180-degree firing arc by positioning where enemies approach from multiple angles. This multi-angle positioning ensures you can hit the maximum number of targets.
Coordinate positioning with firing cooldown to know when to hold position versus when to reposition. Move during recharge periods and hold when ready to fire.
Advanced Positioning Techniques
Use terrain to funnel enemies into your firing arc by positioning near chokepoints. Corners where enemies naturally bunch up create perfect opportunities for devastating volleys.
When evolved with Vampire Lord, positioning can become more aggressive. Life steal allows maintaining health while staying in close proximity to enemy groups.
Position yourself near chokepoints where enemies bunch up to maximize cluster damage. This technique combines environmental awareness with predictive positioning for optimal results.
Optimal Ball Combinations and Item Synergies
Your positioning strategy should inform your ball selection, while evolution choices determine which ball types will provide the best synergies.
Essential Ball Types
Combined with the Vampire Ball, The Spendthrift excels at overwhelming dense enemy formations. This combination maintains health through combat life steal. Soul Sucker only needs one hit for a heal, but the debuff must wear off before it can trigger again. Using ghost/wind or AOE balls provides the most healing instances by applying hits efficiently.
The Spendthrift's mechanics revolve around ball multiplication. Ball multiplication and sustain scaling are the focus of the most effective builds, requiring evolutions and items that provide healing, shields, or damage reduction.
Baby Rattle Synergy
Baby Rattle appears as a particularly effective item for The Spendthrift. It likely enhances ball production or modifies the firing pattern to complement the character's mechanics. The Spendthrift works best when you have many balls because he fires them all at once. This makes Baby Rattle particularly effective for maximizing burst potential.
Optimal Usage Strategy:
- Activate Baby Rattle when your ball count is at its peak (15+ balls)
- Combine with leadership bonuses for maximum ball production
- Time usage to coincide with dense enemy waves
Leadership Character Pairings
The Spendthrift works exceptionally well when paired with a high leadership character. Leadership characters provide buffs that enhance The Spendthrift's ball-count-dependent playstyle. These pairings create powerful synergies through shared ball multiplication effects. The leadership bonuses directly amplify The Spendthrift's core mechanics.
Effective Pairing Strategies:
- Leadership bonuses enhance ball-count-dependent mechanics
- Pair with characters that increase ball production
- Focus on synergies that amplify the "many balls" advantage
Matchmaker Combinations
The Spendthrift's wide arc can complement characters with more focused fire patterns. This creates a balanced offensive strategy through Matchmaker combinations. Area denial abilities pair naturally with The Spendthrift's spread-fire approach. The combination covers both wide areas and specific targets effectively.
Balanced Team Compositions:
- Pair with single-target damage dealers for balanced offense
- Combine with zone control specialists for complete battlefield coverage
- Use complementary firing patterns to eliminate all enemy types
Progression Builds for Every Game Phase
Understanding ball count thresholds is essential for building the right strategy at each phase. Your evolution selection and positioning approach should evolve with your ball count.
Early Game Strategy (1-7 Balls)
The Spendthrift starts as a high-risk, high-reward character who significantly underperforms in the early game. This phase demands careful investment to build the foundation for devastating late-game performance.
Primary Focus: Ball Count Investment - Your primary focus must be on ball generation mechanics rather than immediate damage output. The Spendthrift requires this early investment to create the ball count necessary for future scaling.
Survival Tactics:
- Prioritize ball multiplication evolutions above all else
- Maintain defensive positioning with clear escape routes
- Accept that damage will feel underwhelming until critical mass (15+ balls)
The Spendthrift's reduced ball control makes him extremely vulnerable when surrounded. You must play conservatively, always positioning near edges or open areas where you can retreat while your limited ball count whittles down enemies.
Recommended Evolution: Soul Sucker for maximum early game survival.
Mid Game Transition (8-14 Balls)
As The Spendthrift's effectiveness begins scaling with ball count, you'll notice his power curve shifting from liability to asset. This transition phase is about balancing continued ball generation with the sustain needed to survive increasingly dangerous waves.
Key Development: Sustain Scaling - The most effective Spendthrift builds now require evolutions and items that provide healing, shields, or damage reduction. These builds focus on ball multiplication and sustain scaling to survive positioning mistakes.
Strategic Priorities:
- Ball multiplication remains your top priority
- Add sustain evolutions to survive positioning mistakes
- Start mastering predictive firing patterns
- Select ball types that pierce or chain for better crowd control
Your firing mechanics become more forgiving as quantity compensates for reduced control. However, you must still respect the character's vulnerability until your sustain catches up with your offensive potential.
Recommended Evolution: Transition to Vampire Lord for improved sustainability.
Late Game Dominance (15-24 Balls)
The Spendthrift's effectiveness scales exponentially once you achieve true ball count dominance. You've moved from managing scarcity to harnessing abundance, transforming into one of the most powerful characters for area clearing.
Critical Threshold: "Way Too Many Balls" - This isn't just a large number - it's the critical threshold where "way too many balls" creates overwhelming screen coverage that enemies cannot navigate.
Optimization Strategy:
- Combine ball multiplication with area-of-effect evolutions
- Stack multiple sustain sources for near-invincibility
- Position aggressively to maximize ball spread patterns
- Choose ball types that ricochet to cover screen edges
The screen becomes a death zone where your only limitation is ensuring you don't lag behind your own ball generation. Enemy formations dissolve before they can even approach your position.
Recommended Evolution: Succubus for balanced damage and survivability.
End-Game Optimization (25+ Balls)
Fine-tuning your build for specific content requires understanding advanced synergies that push The Spendthrift beyond raw ball count. The difference between good and optimal lies in how you combine your evolutions.
Advanced Techniques: When evolved with Vampire Lord, positioning becomes dramatically more aggressive. Life steal allows you to maintain full health while standing in the center of enemy groups, maximizing ball collision potential.
Mastery Strategies:
- Stack damage reduction with life steal for true immortality builds
- Adjust ball types based on enemy size (piercing for crowds, explosive for elites)
- Use predictive positioning to spawn balls where enemies will be, not where they are
- For high-difficulty scenarios, sacrifice some damage for additional shield generation
The end-game is about efficiency - ensuring every ball fired contributes to both damage and sustain while eliminating any downtime in your firing cycles. Your overwhelming screen coverage should make it impossible for any enemy type to threaten you.
Recommended Evolution: Vampire Lord for maximum aggressive positioning potential.
Conclusion
Mastering The Spendthrift represents one of the most rewarding character journeys in Ball X Pit. This guide has shown you how to transform from managing scarcity in early game to harnessing overwhelming abundance in late game. The character's unique wide-arc firing mechanics demand patience and strategic thinking.
Your evolution selection must adapt by game phase, prioritizing Soul Sucker for early survival, transitioning to Vampire Lord for mid-game sustainability, and completing with Succubus for late-game dominance. Success hinges on understanding that The Spendthrift isn't about individual ball control but about creating overwhelming screen coverage through simultaneous firing.
Position mastery and predictive play become your greatest weapons as ball count scales exponentially. Embrace the high-risk, high-reward nature of this character. Early investment pays dividends when you achieve the critical threshold of "way too many balls" (25+ balls), transforming you into an unstoppable force of nature.
The Spendthrift rewards those who understand his mechanics completely, offering some of the most satisfying gameplay when mastered properly.
More Ball-x-Pit Guides
The Repentant Build Guide: Mastering Bounce Mechanics & Top Evolution Combos
Master The Repentant character in Ball X Pit with our comprehensive guide covering optimal evolutions, fusion strategies, character builds, and advanced gameplay tactics.
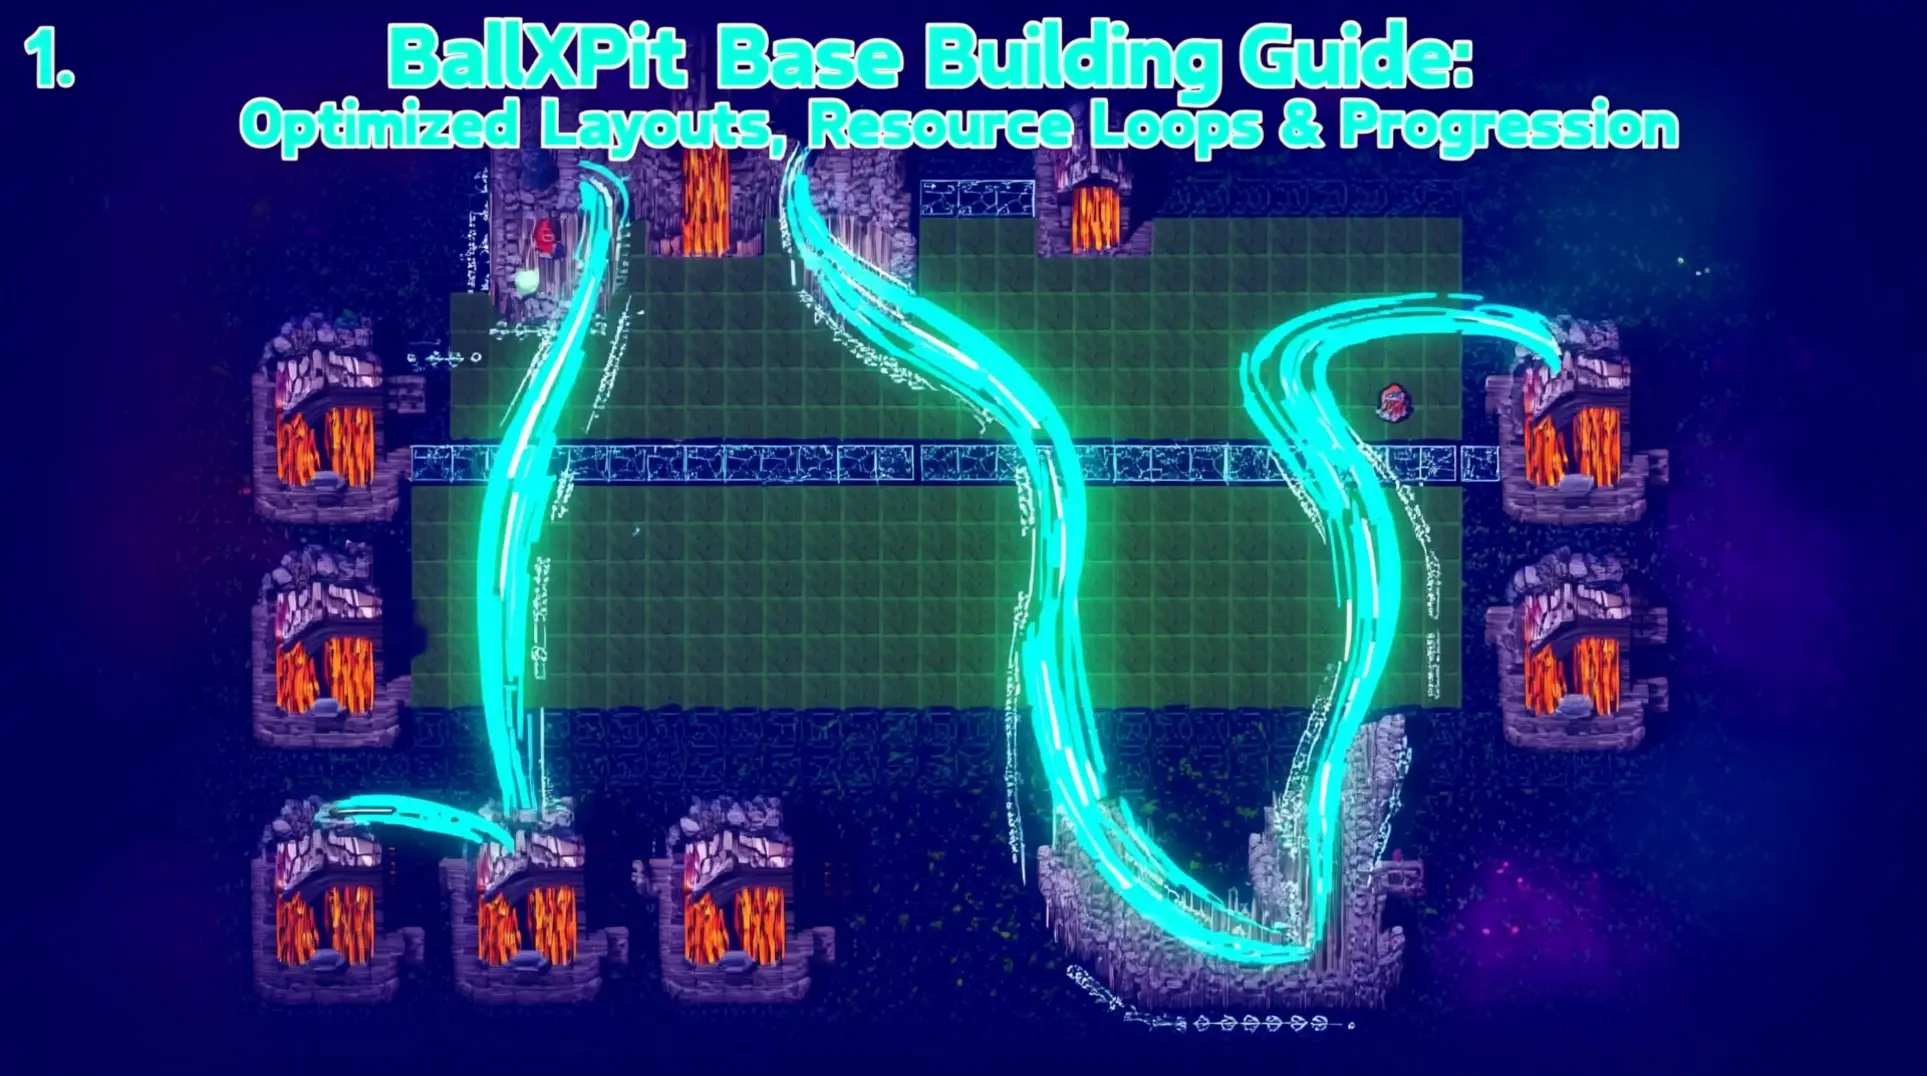
BallXPit Base Building Guide: Optimized Layouts, Resource Loops & Progression
Master BallXPit base building with our complete guide. Learn the 7-mine U-shape gold farm, optimal build order, character unlocks, and advanced resource loops to dominate every run.
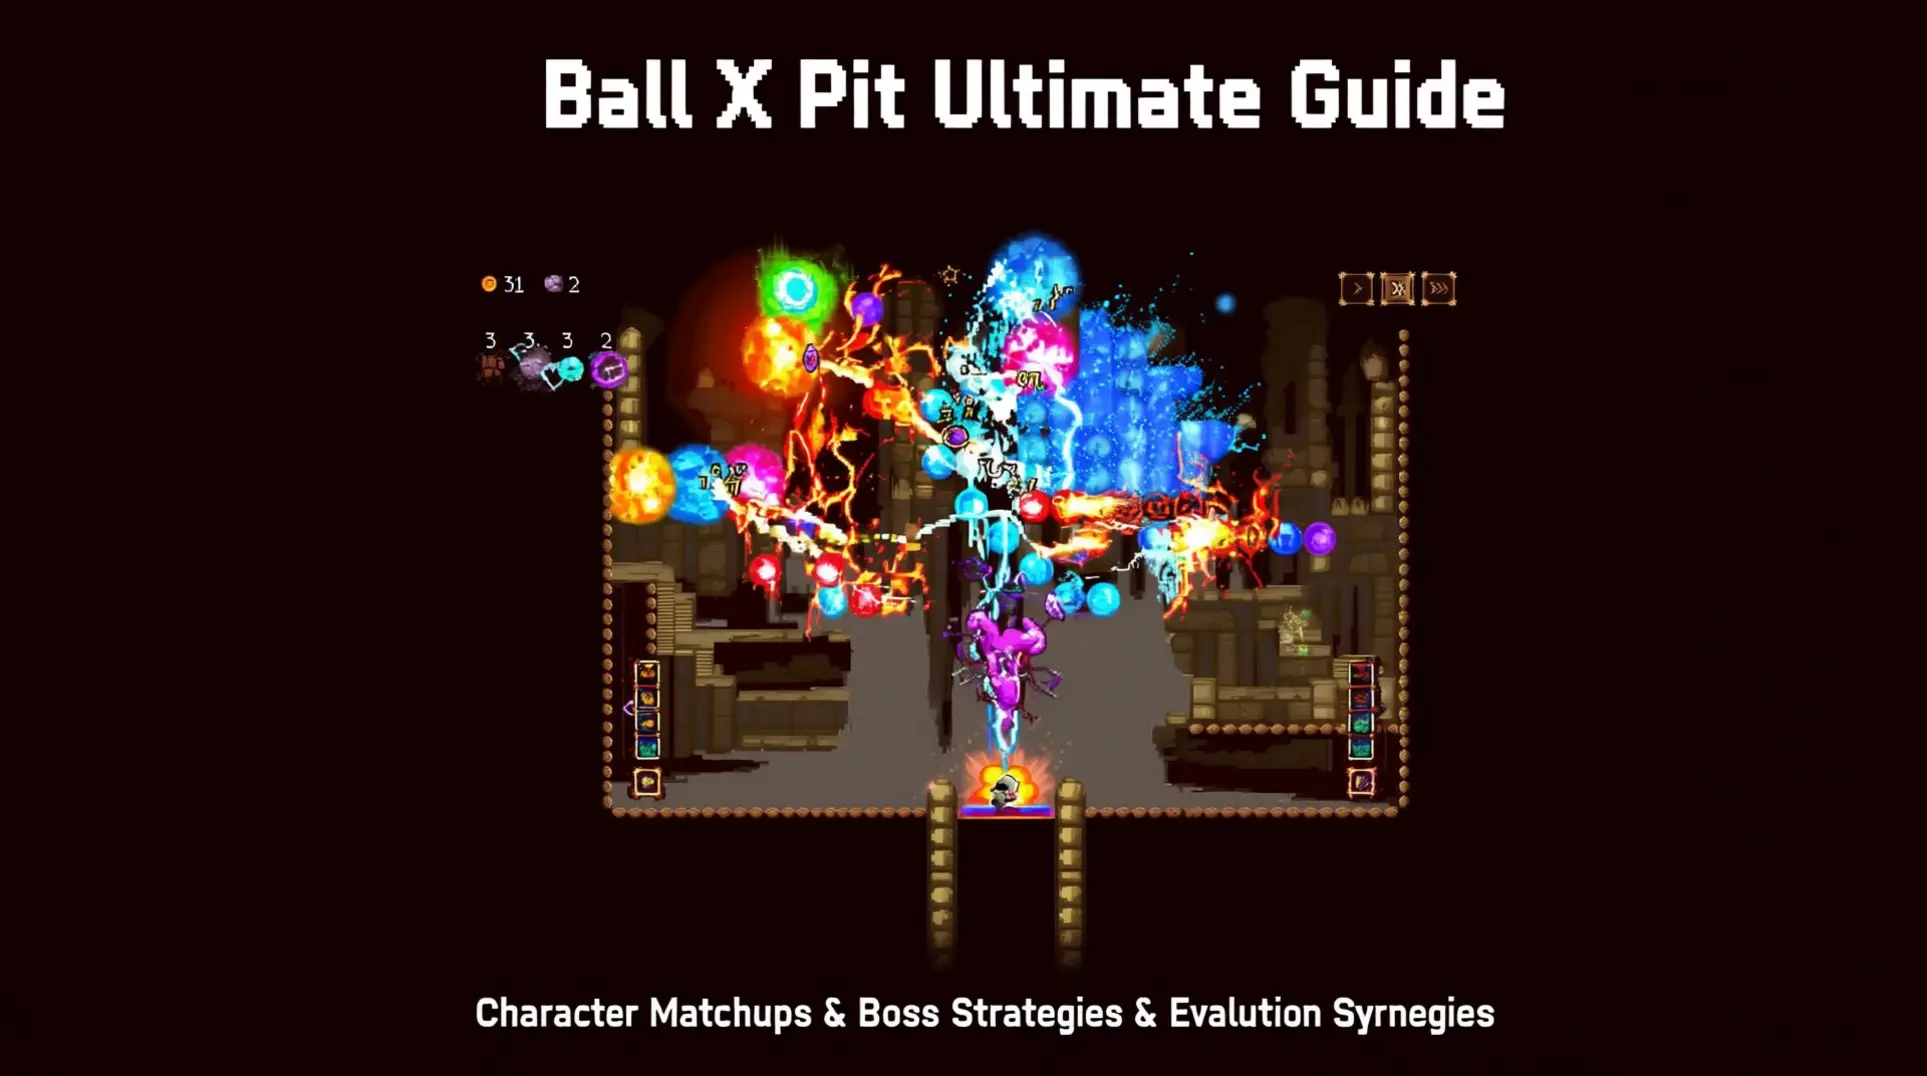
Ball X Pit Ultimate Guide: Character Matchups, Boss Strategies & Evolution Synergies
Master Ball X Pit with our complete guide covering character matchups, boss strategies, evolution synergies, and community-proven tactics for every stage from Skeleton King to Void Sovereign.
AI Tactical Companion
Consult with our specialized tactical engine for Ball-x-Pit to master the meta instantly.