Ball X Pit Wheat Farming: 5 Steps to Maximize Passive Income
Why Wheat Farming Defines Your Success in Ball X Pit
Ready to turn your Ball X Pit farm into a goldmine? Wheat farming isn't just another activity—it's the backbone of your entire operation. As this management simulation game's primary passive income source, mastering wheat production is the difference between struggling survivors and agricultural empire builders.
Building Your Passive Income Engine
In Ball X Pit, strategic farming directly impacts your long-term progression and resource accumulation. The game's automated harvesting systems work around the clock, but only if you've laid the proper groundwork.
Through smart layout optimization that directly impacts total wheat production per time cycle, and strategic upgrades that allow for progression and yield improvement, you can dramatically increase your efficiency and transform your wheat fields into the ultimate passive income machine.
Your Path to Maximum Yield
This 5-step guide will walk you through everything you need to know, from initial setup to advanced optimization techniques for maximum efficiency. Get ready to power your entire gameplay experience with a thriving wheat empire.
Step 1: Understanding Ball X Pit's Wheat Farming Mechanics
Core Wheat Farming System Overview
Ball X Pit features automated wheat farming with passive income generation. This core mechanic allows your crops to continuously produce resources, creating a steady income stream even during inactive periods.
The game includes both manual and automated harvesting mechanisms. Players can personally collect their wheat or implement systems that handle harvesting automatically, providing flexibility in playstyle and convenience.
Resource management is crucial for long-term farming success. You'll need to carefully allocate your resources between purchasing seeds, expanding your farm, and investing in upgrades to maintain sustainable growth over extended gameplay sessions.
Upgrade systems allow players to improve growth speed and yield per plant. These upgrades represent critical investments that compound your farming efficiency over time, making each subsequent harvest more valuable.
Players can optimize their farming approach for maximum efficiency. This involves strategic decision-making about layout, upgrades, and resource allocation to create the most productive farm possible.
Automated Farming: A passive income system where wheat grows and generates resources without constant player attention.
Harvesting Mechanisms: Two distinct methods for collecting crops—manual gathering by the player or automated collection systems.
Key System Features
- Passive Income Generation: Automated wheat farming continues producing resources while you're away from the game
- Flexible Harvesting Options: Choose between manual collection or automated harvesting mechanisms based on your preference
- Comprehensive Upgrade Systems: Improve both growth speed and yield per plant through strategic investments
- Critical Resource Management: Balance seeds, expansion, and upgrades for long-term farming success
- Optimization Potential: Players can refine their approach for maximum efficiency at every stage
Wheat Yield Variables and Factors
Wheat growth cycles determine harvest timing and yield efficiency. Understanding these cycles is essential for planning when to plant and harvest for maximum productivity throughout your gameplay sessions.
Spacing between plants affects individual yield and overall farm productivity. Proper plant placement ensures each wheat stalk has enough room to reach its full potential, directly impacting your total output.
Soil quality and environmental factors influence wheat production rates. These conditions directly impact how quickly your crops grow and how much they produce at harvest, making them critical considerations.
Players can optimize their farming approach for maximum efficiency by manipulating these variables. Strategic adjustments to spacing and attention to soil conditions create significant improvements in overall farm performance.
Growth Cycles: The timed phases wheat progresses through from planting to maturity, directly affecting harvest scheduling and efficiency.
Yield Optimization: The practice of maximizing output through strategic farming decisions and careful variable management.
Key Factors Affecting Wheat Yield
- Growth Cycles: Timing and efficiency of harvest schedules
- Plant Spacing: Distance between plants affecting individual and overall productivity
- Soil Quality: Environmental conditions influencing production rates
- Upgrade Application: Using upgrades to improve growth speed and yield per plant
- Environmental Factors: Additional conditions that impact wheat production rates
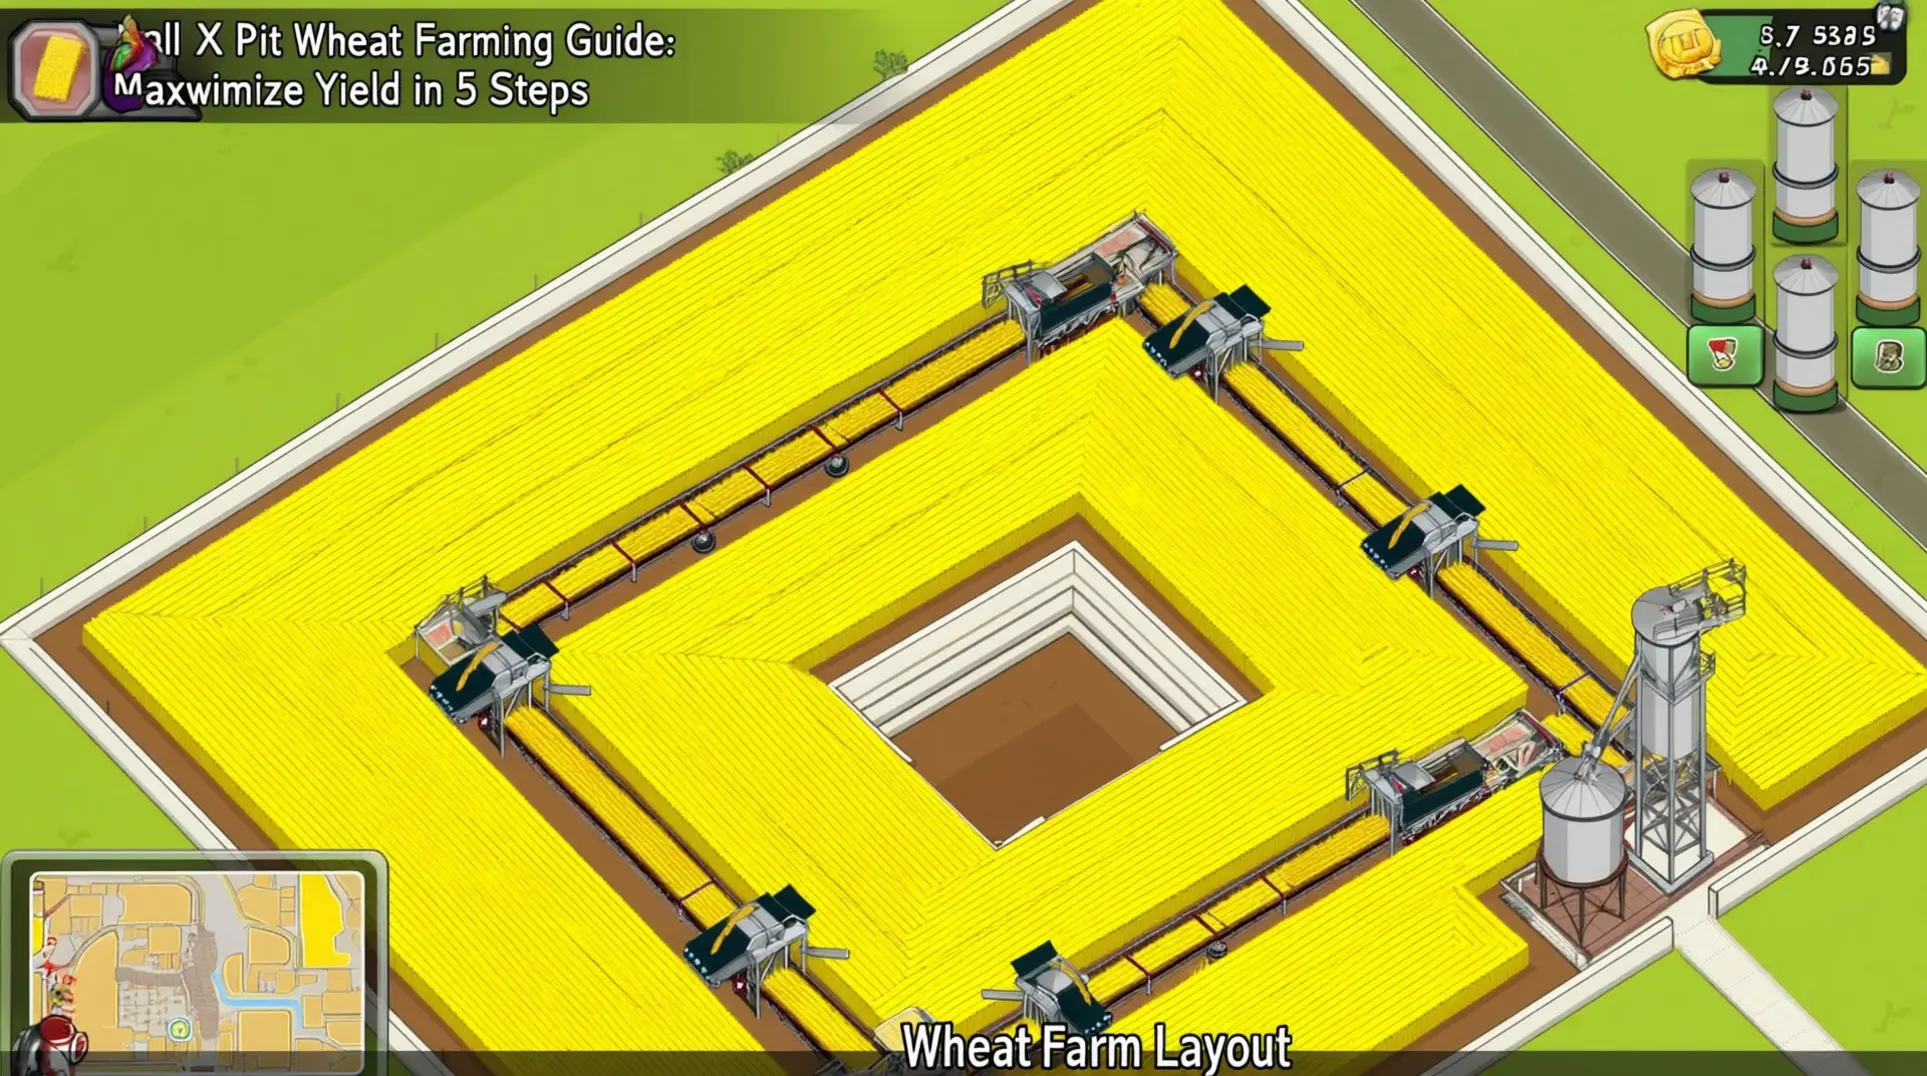
Step 2: Optimizing Your Wheat Farm Layout
Best Layout Patterns for Maximum Efficiency
Ball X Pit supports multiple layout configurations for different farming approaches. This flexibility allows you to customize your farm based on whether you prioritize manual efficiency or automated production.
Grid Pattern: A layout that provides consistent spacing and easy automation in farming games. Grid patterns create a structured environment perfect for automated harvesting systems. The uniform rows and columns make it simple to program harvesters and guarantee complete coverage during each collection cycle.
Hexagonal Pattern: A layout that maximizes plant density while maintaining optimal growth space. Hexagonal patterns maximize your farm's production potential by fitting more plants into the same footprint. This arrangement ensures each wheat plant receives optimal growing space while increasing total yield per area.
Spacing affects individual plant yield and overall farm efficiency. Poor spacing decisions can dramatically reduce your harvest, making pattern selection crucial for success.
Different layout patterns work better for automated harvesting systems. While grids integrate seamlessly with basic automation, hexagonal layouts require more advanced programming to navigate efficiently.
Layout efficiency affects both active and passive farming strategies. Active players who manually harvest benefit from hexagonal density, while passive players relying on timers and auto-harvesters achieve better results with grid layouts.
Layout Pattern Comparison
| Pattern | Best For | Advantages | Considerations |
|---|---|---|---|
| Grid Layout | Automation, beginners, passive income | Easy automation, consistent spacing, reliable harvesting | Lower density than hexagonal |
| Hexagonal Layout | Manual harvesting, maximum yield | Higher plant density, optimal space usage | Requires advanced automation programming |
Your layout choice should reflect your available technology and personal playstyle. Early game players may find grids more accessible, while late-game farmers can maximize returns with hexagonal designs.
Space Utilization and Density Optimization
Space utilization directly impacts total wheat production per cycle. Every block in your farm should be purposefully allocated to growing, paths, or infrastructure to maximize your harvest output and minimize waste.
Density Optimization: The practice of balancing plant count with growth requirements. This essential balance prevents plants from competing for resources while ensuring you maintain the highest possible number of productive wheat stalks for maximum profit.
Strategic placement of pathways and infrastructure within farm layouts is critical. Well-designed paths provide complete access to your crops while consuming minimal space that could otherwise be used for wheat production.
Space Management Tips
- Place paths along natural movement routes to reduce travel time
- Position water sources and storage near collection points for efficiency
- Use boundary areas for infrastructure to preserve central growing space
Effective space management transforms every farm cycle into maximum profit. The difference between a well-optimized farm and a haphazard one can be hundreds of wheat per harvest, dramatically affecting your progression speed.
Remember that density optimization is an ongoing process. As you unlock better tools and upgrades, you may need to adjust your layout to maintain the ideal balance between plant count and individual yield.
Step 3: Upgrade Systems and Investment Strategy
Essential Wheat Farming Upgrades to Prioritize
Upgrade systems allow players to improve growth speed and yield per plant. These improvements form the backbone of any successful wheat farming operation in Ball X Pit, determining how quickly you can scale your production.
Players face a key decision between two primary upgrade paths. Faster growth upgrades reduce time between harvests, while increased yield per plant upgrades multiply output from existing crops. Understanding which to prioritize can make or break your early game progress.
Primary Upgrade Categories
- Growth Speed Upgrades: These should be your first priority as they accelerate your entire farming cycle
- Yield Multipliers: Invest in these to maximize the output from each individual wheat plant
- Automation Tools: Consider automation tools that reduce manual labor and enable passive farming
Automation tools are particularly valuable for scaling your operation. They reduce manual labor and enable passive farming, freeing you to focus on expansion strategies rather than constant maintenance.
Compound Benefits: Some upgrades provide compound benefits that increase over time. These are your highest-priority investments as their value grows exponentially with your farm size, creating a snowball effect of efficiency gains.
As your farm expands, the interplay between these upgrade types becomes more complex. Balancing immediate production needs with long-term scaling potential requires careful consideration of each upgrade's impact on your overall operation.
Resource Allocation for Maximum ROI
Resource allocation decisions impact long-term farming success. ROI varies between different upgrade types, making strategic planning essential for maximizing your wheat production efficiency.
Strategic Timing: Strategic upgrade timing maximizes farming efficiency. Players must balance immediate benefits with long-term progression to avoid stalling their growth or wasting precious resources on low-impact upgrades.
Investment Guidelines
- Evaluate upgrade costs against potential yield increases before committing resources
- Consider your current farm size when prioritizing investments to avoid over-investing
- Adapt investment priorities based on player goals, whether focusing on rapid expansion or steady income
Investment priorities change based on farm size and player goals. A small starter farm benefits from different upgrades than a large-scale operation, requiring you to constantly reassess your strategy as you progress.
Regularly reviewing your upgrade path ensures you maintain optimal efficiency. This adaptive approach prevents resource waste and keeps your wheat farm growing at maximum potential throughout all stages of the game.
Step 4: Advanced Optimization Techniques
Timing and Harvest Optimization
Optimal harvest timing maximizes yield per cycle. You need strategic harvest scheduling to maximize resource generation across your entire farming operation and directly impact profitability.
Crop Rotation: This strategy can improve soil quality and productivity. When you implement crop rotation strategies, you can improve soil quality and productivity over multiple farming cycles, leading to sustained improvements and better yields.
Timing optimization affects both active and passive farming efficiency. Advanced timing strategies can significantly increase overall efficiency when you apply them consistently to your operation and farming cycles.
You should maintain continuous farming cycles to maintain steady income flow. This ensures your fields are always working at peak capacity and generating resources around the clock without interruption.
Key Timing Strategies
- Strategic harvest scheduling to maximize resource generation
- Timing optimization for significant improvements in efficiency
- Crop rotation strategies to improve soil quality
Continuous optimization leads to better long-term results. Focusing on timing and harvest optimization will maximize your wheat production over time and increase your total output substantially.
Passive Income Maximization Strategies
Automated systems enable consistent passive wheat gain while offline. You can set up automated harvesting for consistent production without active participation or constant supervision, making it ideal for busy players.
Passive Income Systems: These work best with proper setup and optimization. Your strategic implementation of automated systems is crucial for maximizing wheat generation and ensuring reliable production over extended periods.
Maximize Your Passive Income
- Set up automated harvesting for consistent production without active participation
- Ensure proper setup and optimization of passive income systems for maximum efficiency
- Apply advanced timing strategies to increase overall efficiency across all farming cycles
Continuous farming cycles maintain steady income flow even during periods of inactivity. This approach ensures your wheat production remains profitable around the clock and generates resources continuously while you're away.
The key to your success is combining automated systems with strategic planning. Proper setup and optimization of passive income systems will maximize your wheat generation over time and improve overall efficiency.
You will see significant improvements when you implement these strategies. Automated harvesting systems are the foundation of passive income that continues generating wheat while you focus on other aspects of Ball X Pit.
Step 5: Scaling and Endgame Wheat Farming
Expanding Your Farm Efficiently
Strategic farm expansion maintains existing production while adding new capacity. This approach ensures you don't sacrifice current yields as you grow your operation, creating a stable foundation for larger profits without downtime or regression.
Scaling Challenges: Resource management and operational complexity increase significantly as your farm grows. These hurdles require careful planning and upgraded systems to overcome without creating bottlenecks that cripple your production pipeline.
Large-scale operations require different approaches than small farms. What worked for your starter plot won't suffice for industrial-level production, demanding new strategies, specialized tools, and a complete mindset shift toward macro-management.
Infrastructure planning becomes critical at scale. You'll need to design layouts that maximize space efficiency while maintaining easy access for maintenance, harvesting, and future expansions to avoid costly redesigns that waste resources.
Advanced players can achieve exponential growth through strategic scaling. By timing expansions with resource availability and market demands, you can compound your profits dramatically and outpace linear growth models through smart reinvestment.
Endgame Optimization and Min-Maxing
Endgame optimization focuses on maximum efficiency and yield per unit time. Every second counts when you're managing massive wheat operations, requiring precise timing and coordination across all automated and manual systems.
Min-Maxing Strategies: These push farming efficiency to theoretical limits. You'll squeeze every possible advantage from game mechanics, farm layout, and crop cycles to maximize output beyond what normal players consider possible.
Endgame strategies often involve complex automation and optimization. Manual processes become bottlenecks that prevent reaching peak production levels, making automated systems essential for true min-maxing and eliminating human error.
Resource allocation becomes more sophisticated at advanced levels. You'll balance labor, equipment, and land costs against potential yields to find the perfect profit point for your operation where marginal gains justify investments.
Maximum efficiency requires balancing multiple optimization factors simultaneously. It's not just about planting more—it's about planting smarter, harvesting faster, and selling at the perfect moment to achieve true min-maxed performance in Ball X Pit.
Frequently Asked Questions (FAQ)
What's the most efficient wheat layout in Ball X Pit?
Grid Layout: This arrangement is most efficient for automated systems and beginners. It provides structured spacing that automation tools navigate reliably. Grid layouts ensure consistent harvesting patterns.
Hexagonal Layout: This pattern maximizes density for manual harvesting. It packs more wheat into the same space when harvesting by hand. Hexagonal arrangements optimize land usage for active farmers.
Your choice depends entirely on your harvesting method. Automated systems perform best with grid layouts, while manual harvesting benefits from hexagonal density. Consider your long-term strategy when selecting a layout.
How often should I harvest my wheat for maximum yield?
Timing Optimization: Harvest timing depends on growth cycles and upgrade levels. This practice affects harvest frequency and efficiency directly. Strategic timing maximizes both active and passive farming efficiency.
You'll need to monitor your specific setup to determine optimal frequency. Adjust your harvest schedule based on current growth speed and yield multipliers.
Different upgrade combinations work better at different farm sizes, which impacts timing. Regular monitoring helps identify your farm's productivity sweet spot. Pay attention to how quickly wheat reaches maturity under your current conditions.
Which upgrades provide the best return on investment for wheat farming?
Growth Speed Upgrades: These provide the best early ROI. They accelerate production cycles and generate quick returns. Faster growth means more harvests in less time, making them ideal for beginners.
Yield Multiplier Upgrades: These excel at larger scales. They become more valuable as your farm expands. Multipliers compound your existing output for greater efficiency.
Different upgrade combinations work better at different farm sizes. Start with growth speed to establish momentum, then shift toward yield multipliers. Strategic timing maximizes both active and passive farming efficiency.
How does passive wheat generation work in Ball X Pit?
Passive Generation: This requires automated harvesting systems. Automation tools are essential for true passive income. They handle harvesting while you're away from the game.
Grid layouts are most efficient for automated systems and beginners. This makes them ideal for passive setups. Even with automation, strategic timing maximizes both active and passive farming efficiency.
Different upgrade combinations work better at different farm sizes, affecting passive output. Invest in automation infrastructure before expecting meaningful passive generation. Without automated tools, true passive income isn't possible.
Conclusion
Mastering wheat farming in Ball X Pit transforms your gaming experience from survival mode to empire building. The five-step approach we've outlined—from understanding core mechanics to implementing endgame optimization—provides a clear roadmap to agricultural success.
Start with Step 1 to build your foundation, then progressively implement each strategy as your farm grows. Remember that wheat farming is a long-term investment; the upgrades and optimizations you make early compound into massive returns later.
The difference between casual farming and optimized production can mean the difference between struggling for resources and building a wheat empire that generates passive income around the clock. Your journey to maximum yield begins with a single seed—plant it wisely and watch your Ball X Pit farm flourish.
More Ball-x-Pit Guides

BallXPit Base Building Guide: Optimized Layouts, Resource Loops & Progression
Master BallXPit base building with our complete guide. Learn the 7-mine U-shape gold farm, optimal build order, character unlocks, and advanced resource loops to dominate every run.

Ball X Pit Ultimate Guide: Character Matchups, Boss Strategies & Evolution Synergies
Master Ball X Pit with our complete guide covering character matchups, boss strategies, evolution synergies, and community-proven tactics for every stage from Skeleton King to Void Sovereign.

Ball X Pit Damage Formula Guide: Master Intelligence Scaling and Status Effects
Master Ball X Pit's hidden damage formula with Intelligence scaling, status effect stacking, and optimal build strategies for endgame dominance.
AI Tactical Companion
Consult with our specialized tactical engine for Ball-x-Pit to master the meta instantly.