Palworld Assembly Line Mastery: Boost Production Efficiency 50%
Understanding Palworld's Production Mechanics
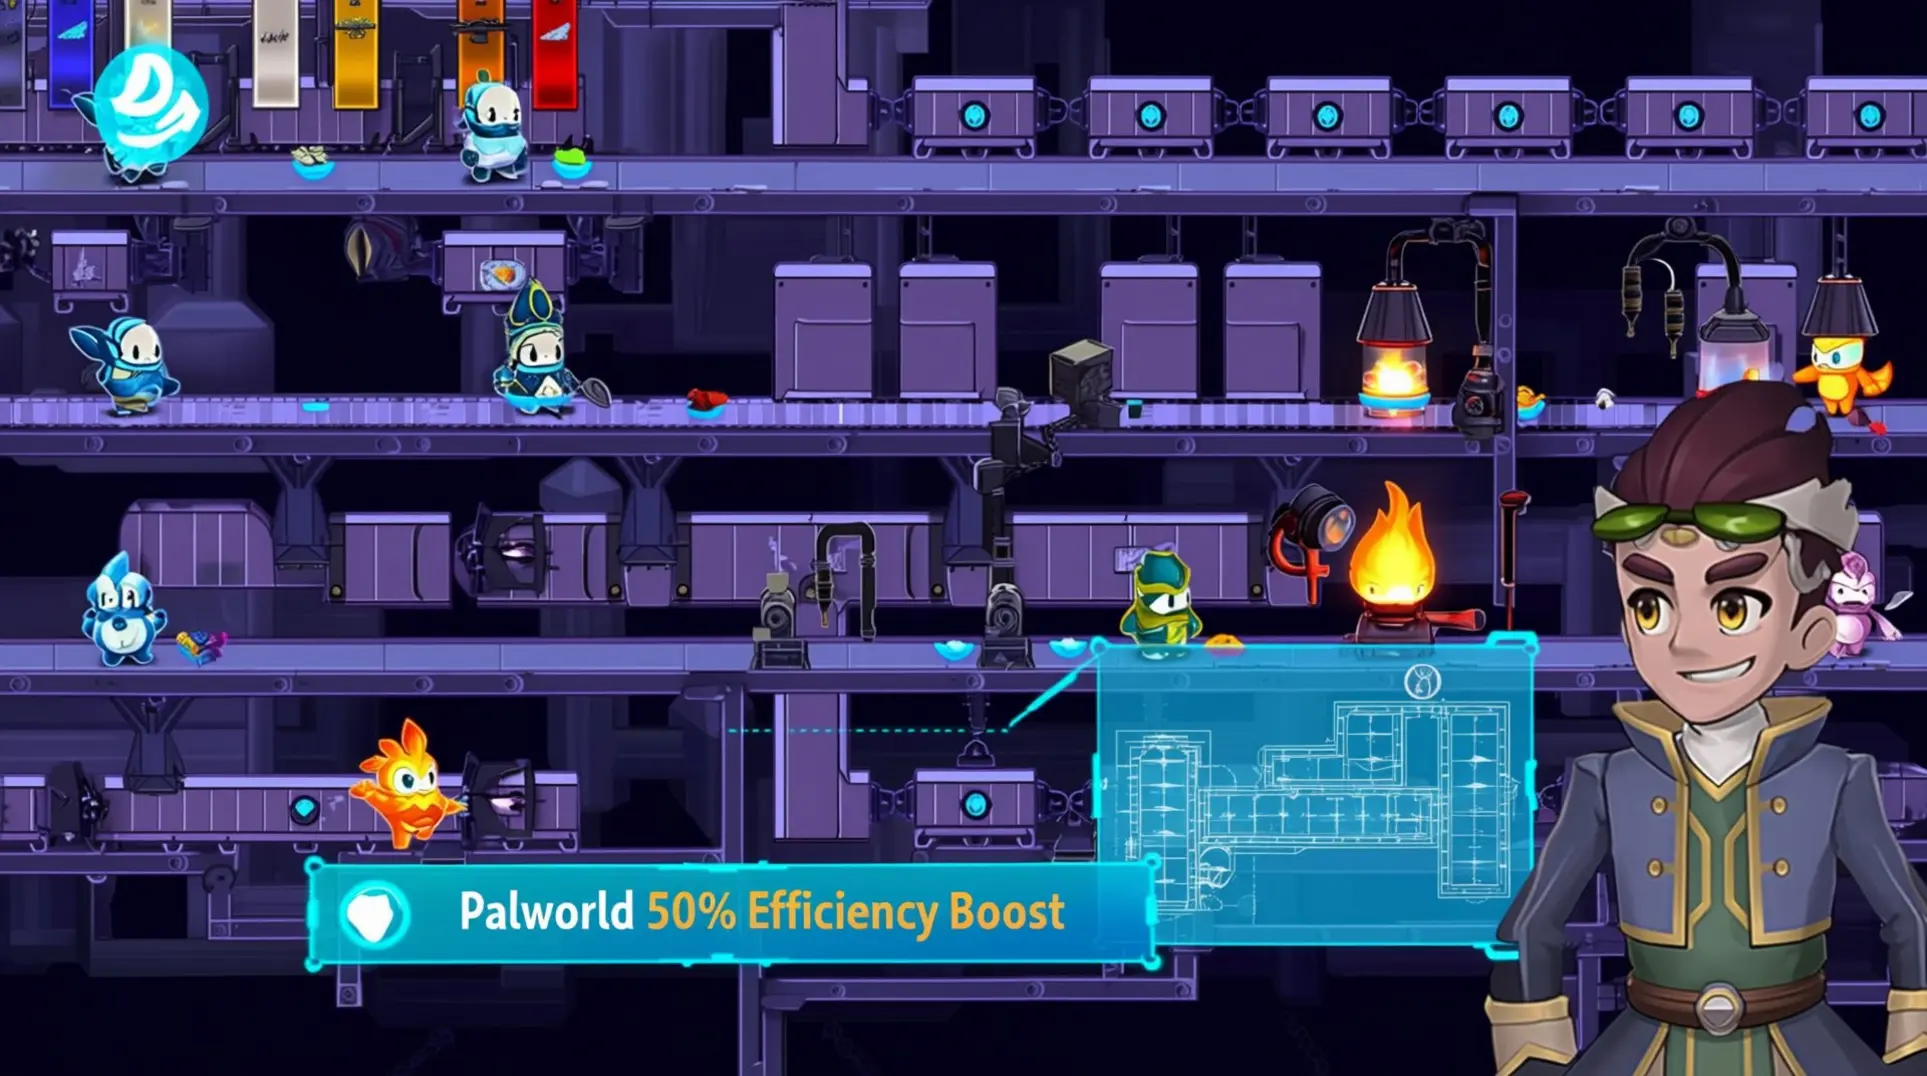
Mastering Palworld’s production mechanics is the key to transitioning from a simple camp to a fully automated industrial base. At the heart of this system is the Production Assembly Line, an electricity-dependent facility that serves as a massive upgrade from basic workbenches.
- Unlocking this at character level 28 is just the first step.
- You’ll also need to gather significant resources like Ingots and Cement to build it.
Core Workflow Components
This machinery doesn't run itself. Its efficiency is entirely dependent on your Pals and their Work Suitability traits. To operate an Assembly Line, you need Pals with the Handiwork specialty; their efficiency is tiered from Level 1 to 4, with higher levels drastically accelerating production speed.
However, crafting items is only part of the workflow. The entire system relies on a complex, interconnected pipeline:
- Mining Pals extract metal ore.
- Lumbering Pals gather wood.
- Gathering Pals harvest food to keep everyone working.
The Role of Transporting and Power
Crucially, the introduction of Transporting Pals in a recent update automated the final, vital step. These Pals tirelessly ferry finished goods from the Assembly Line to your storage chests, creating a seamless flow. This entire operation is powered by Pals with the Electricity Generation trait, making them non-negotiable for any advanced base.
As the community discovered after the Feybreak update, the meta is always shifting, with Pals like Mimogs now being tested for their superior transporting capabilities. The key to success is a balanced team where each Pal’s specialty contributes to a single, efficient production machine.
Optimal Base Layout for Maximum Efficiency
For maximum efficiency, your Palworld base must be a single-layer, flat layout. Community testing has consistently shown that multi-level designs, even those with wide staircases, cause significant pathfinding issues for Pals, leading to constant "unreachable" workstation notifications.
Foundational Layout Principles
To avoid this, you must prioritize a single-story design built within the optimal radius of approximately 17 squares from your Palbox. This provides a generous 221 squares of buildable space. Your workstation placement strategy is crucial.
- Focus on grouping similar functions together to minimize travel time between interconnected processes.
- For example, place ore mines near furnaces.
- Prioritize wide, clear pathways of 5 squares to prevent congestion and ensure Pals can navigate easily between production areas, storage, and resource nodes.
Remember, advanced workstations can handle the functions of their basic counterparts, eliminating the need for duplicate benches and saving valuable space.
Location and Final Goals
While a location like the flat desert area at coordinates 171, -560 is ideal for its terrain, it lacks natural resources, so plan accordingly. The ultimate goal is a passive-operating, factory-style base where a well-organized flat layout minimizes travel time and completely avoids the game's notorious pathfinding struggles with vertical navigation.
Advanced Automation Techniques
Mastering Palworld’s endgame hinges on building sophisticated, self-sustaining production lines. The entire system operates on a critical three-beat principle: extraction, processing, and delivery.
- Any delay in this chain causes significant efficiency losses.
- This makes optimized Pal pathfinding and strategic base layout the top priority for automation.
Gold Coin Minting Optimization
The pinnacle of this automation is Gold Coin minting optimization. The most efficient method involves creating dedicated assembly lines that can process nearly 10,000 coins per batch. This requires:
- Multiple furnace setups manned by fire Pals like Ignis for accelerated smelting.
- An automated transportation system to move ore to storage and finished ingots directly to the crafting stations.
Strategic base placement near abundant metal nodes is essential to fuel this lucrative operation.
Endgame Production Goals
For broader production, endgame goals revolve around the Production Assembly Line II and Weapon Assembly Line II. These powerful stations handle advanced item, armor, and top-tier weapon manufacturing but demand complex resource chains and highly specialized Pal assignments to function smoothly.
Success is achieved through:
- Pal specialization and condensing, which dramatically boosts a Pal’s work efficiency.
- Meticulous base layout optimization.
Key tips include placing the Palbox at a junction for precise measurement, minimizing travel paths between workstations, and positioning storage like Refined Metal Chests against walls to streamline the entire automated process.
Pal Selection and Workforce Management
Effective workforce management in Palworld requires understanding the 12 distinct job specializations that form the foundation of your production system. Each Pal has specific work suitability levels across critical categories including Kindling, Watering, Planting, Generating Electricity, Handiwork, Gathering, Lumbering, Mining, Medicine Production, Cooling, Transporting, and Farming.
Optimizing with Passive Skills
The January 2025 Feybreak updates revolutionized workforce optimization with changes to passive skills. The ultimate productivity booster is the Artisan passive (+50% work speed).
This is supported by other key passives:
- Serious for additional efficiency.
- Workaholic for critical mental health management (-15% SAN depletion).
- Lucky for versatile dual-purpose benefits.
- Diet Lover to reduce maintenance requirements.
Managing Sanity and Specialization
Mining operations present the most severe SAN depletion challenges. Research shows that Tombats with level 2 mining working 8-9 ore deposits suffer from baseline SAN consumption, leading to depression despite hot tub facilities.
Effective solutions include:
- Upgrading to higher-quality SAN-restoring foods.
- Implementing rotation systems with fresh Pals.
- Strategic Workaholic skill deployment.
- Regular hot tub utilization for temporary relief.
Create specialized teams for each production chain rather than relying on generalists. Ensure adequate Transporting Pals for logistics efficiency, deploy Pals according to their elemental strengths, and use breeding mechanics to create "perfect" Pals with optimal passive skill combinations for specific roles.
Troubleshooting Common Production Issues
Even the most advanced Palworld production lines can grind to a halt due to a few common issues. The most frequent culprit is a resource shortage, particularly for ore and metal.
To overcome this, the solution isn't just more Pals—it's smarter logistics.
- Dedicate entire mining bases to specific resources.
- Staff them with high-level mining specialists (those with Level 3-4 suitability).
- Ensure they are strategically placed atop rich nodes.
For complex operations, implementing automated transportation between bases is often essential to keep materials flowing.
Power and Pathfinding Failures
Beyond raw materials, power management is a critical, yet often overlooked, component. A single failure in your electricity generation can idle your entire factory. The fix is redundancy: ensure you have multiple Electric-type Pals with high Generating Electricity suitability and consider building several power generation facilities to create a resilient grid.
Perhaps the most frustrating problems stem from Pal pathfinding. Community testing has shown that Pals struggle immensely with verticality; even spacious, multi-level bases with wide staircases result in constant "unreachable" notifications.
For reliable operation, a single-layer, flat layout is highly recommended. Additionally, combat congestion by building pathways 5 squares wide between workstations and creating dedicated "highways" to prevent Pals from getting stuck and halting your carefully planned production chains.
Conclusion: Mastering Your Palworld Factory Empire
Building an efficient Palworld assembly line system requires careful planning across multiple dimensions: understanding production mechanics, optimizing base layout, implementing advanced automation, managing your workforce effectively, and troubleshooting common issues. The key to success lies in creating a balanced ecosystem where each component—from resource extraction to final product delivery—works in perfect harmony.
Remember that Palworld's meta continues to evolve with updates like Feybreak, so staying informed about community discoveries and optimization techniques is crucial. Focus on creating specialized teams, maintain your Pals' sanity with proper food and facilities, and always prioritize clear pathfinding and logistics in your base design. With these strategies, you'll transform your base into a highly efficient manufacturing hub capable of producing everything from basic materials to advanced weaponry and legendary spheres.
More Palworld Guides

Palworld vs Nintendo: Inspiration or Plagiarism Battle
Explore the full story behind Nintendo's patent lawsuit against Palworld developer Pocketpair. Learn about design similarities, legal precedents, and industry impact.

Palworld PC vs Xbox Performance: Ultimate Platform Comparison Guide
Complete guide comparing Palworld performance on PC vs Xbox, including frame rates, graphics, optimization tips, and platform recommendations.

Palworld Dungeon Map: Complete Locations & Rewards Guide
Master Palworld's 139 dungeons with our comprehensive guide featuring exact coordinates, farming strategies, and reward optimization tips.
AI Tactical Companion
Consult with our specialized tactical engine for Palworld to master the meta instantly.